Showing posts with label Bungalow. Show all posts

Thursday, 20 December 2018

Review Of The Year - Part 1

I've established a tradition on this blog in the last days of December of taking stock of everything that Himself and I have achieved over the year.

I usually find there are things that I've forgotten about, and I'm always surprised by how much we've got done.

So here's a look back at what we were up to in the first quarter of 2018.

January

Looking back now I see that there was a lot of carriage building going on at this time.

FR 'superbarn' 118, which I'd built up from resin castings, had been painted, assembled, had its transfers applied and, finally, varnished.


Himself was also starting work on a very long-term project indeed - the completion of a Worsley Works bowsider 19 which had been sitting in a drawer in its naked state for years.


I was also busy trying to keep up with the expanding WHR carriage fleet and had started work on saloon 2047 which was being scratch built in styrene - as opposed to the resin parts I use for the latest FR stock.


February

This was the big reveal of our finished Robex 3D printed Lilla.


I thought at the time - and still do - that it looks absolutely stunning!

We'd decided to finish it in its current, highly ornate, plum livery with oodles of gold leaf lining.

It was taking up all Himself's reserves of patience and concentration but it was already clear the results were going to be worth it.


He'd also restarted work to plug the last remining scenic gap on the layout, landscaping around the last two houses I'd built.


March

There was yet more carriage work going on with me kit-bashing a Dundas 'Bro Madog' carriage to make it look like it's current condition on the WHHR.

As to why I was doing it, that was about to be revealed...


I'd also been putting together the castings for the second of the latest FR observation carrs 152 ready for Himself to add a brass roof and the window pillars at the front.


The reason I was making a WHHR carriage became clear when I handed over Himself's birthday present - a Robex print for the Bagnall Gelert.


I had confidence that he'd make a fine job of the body, after what he'd done with Lilla

The challenge for him was going to be doing the outside frame adaptation on a Fleischman chassis to go under it.

I had a feeling he wasn't going to thank me for that...


Monday, 5 March 2018

Talking Turf

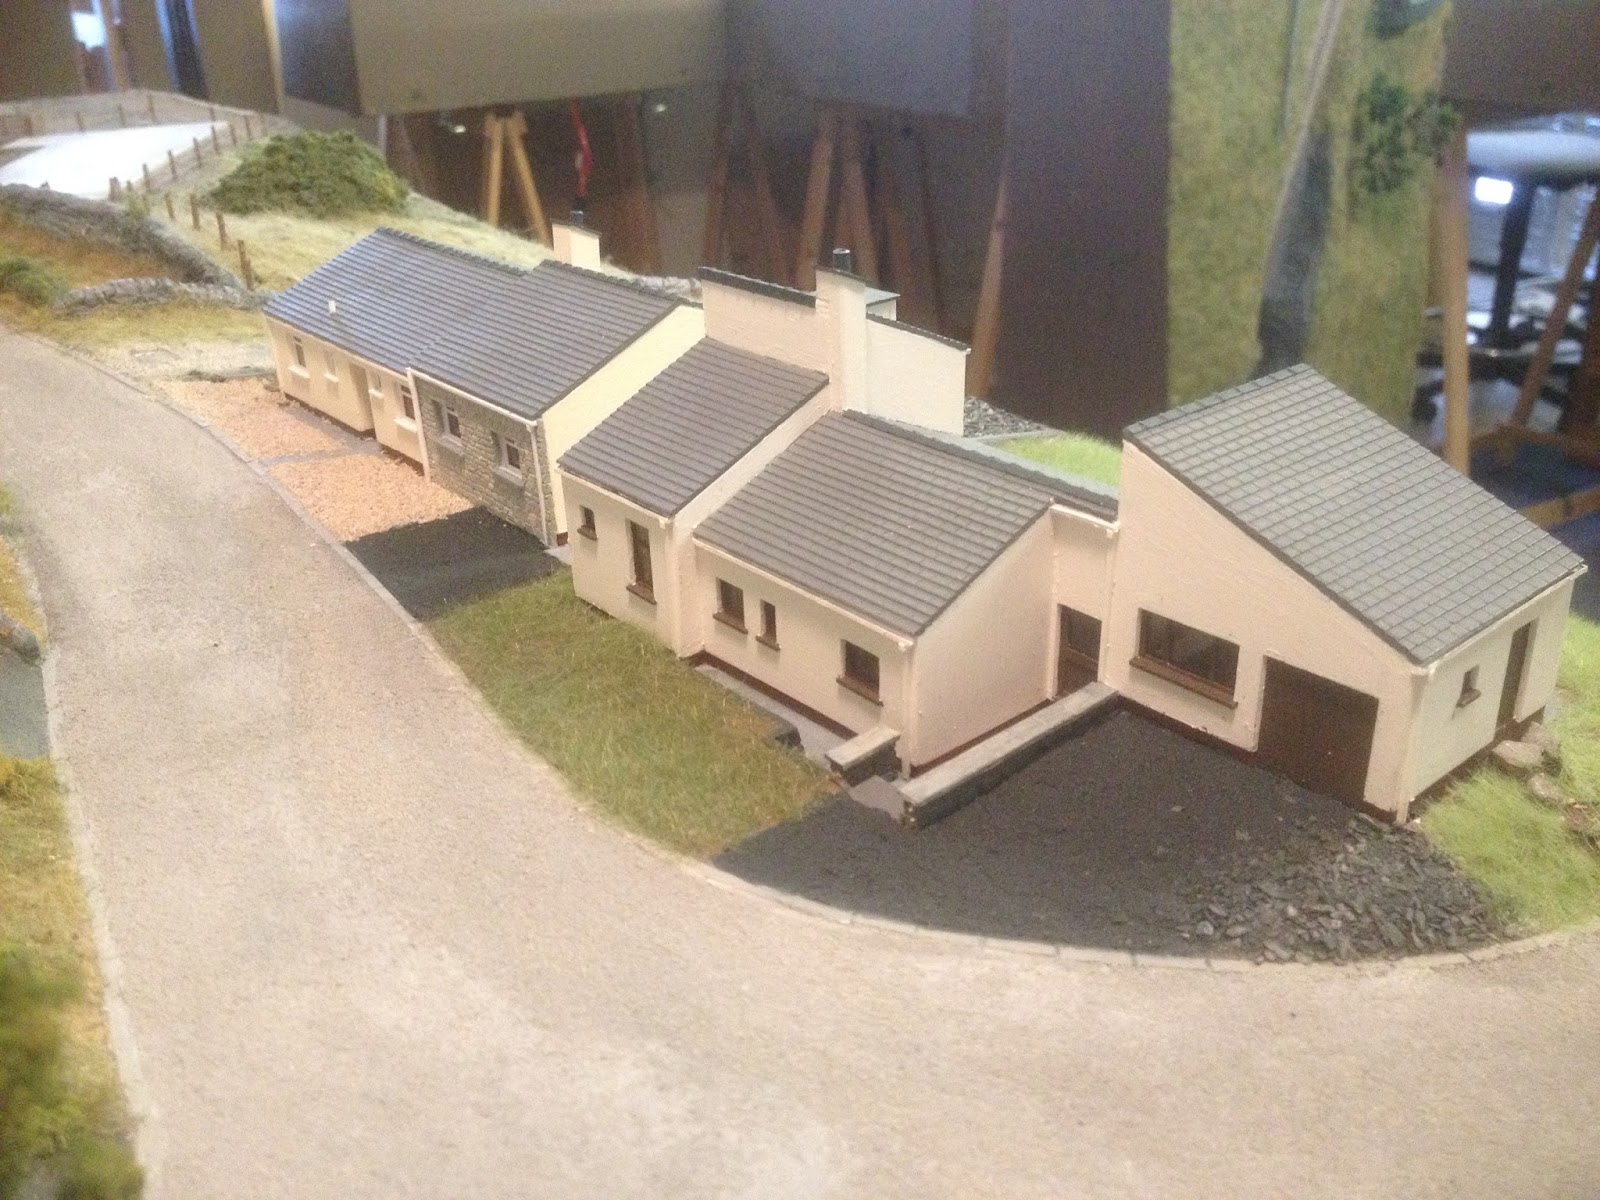
A little more scenic work has been done on the last bit of the housing estate scene.


I guess Himself must have wrapped up warm before heading into the garage because my post last week about the weather getting milder appears to have been classic case of speaking too soon given what we've just been through!

The areas around these two houses are quite complicated with a mix of lawn, tarmac, slate waste and gravel to represent.


There are still quite a lot of small details to add, such as fencing, sheds and even a playhouse.

Speaking of which, if we're being completely accurate the bungalow should really have a hot tub on the patio if we're being completely authentic.

Should we?

Sunday, 25 February 2018

Out Of Hibernation

It would be foolish to declare the end of winter is in sight but we've enjoyed a comparatively warm spell on the Costa del Clyde in recent days, warm enough, in fact, for Himself to venture into the garage and resume work on the estate scene.


He has started work on landscaping around the final two bungalows (mostly) at the front of the layout, with the aid of some plaster.


The area towards the bottom of the picture above (in front of the conservatory) will be grassed over as the garden.

On the other side - facing the operators, so the bit most folk don't see - are the front entrances to the houses which will be mostly gravel or paving.


How much more gets done, and how soon, is very much in the hands of the weather systems I suspect, but Himself has plenty to keep him busy indoors and outdoors right now.

Saturday, 30 December 2017

Review Of The Year - Part 4

For the last post of 2017 I'll bring our modelling review of the year up to date.

October

Himself was steadily getting on with the top coats on the Superbarn 118 between other jobs.


He had many tasks on the go including fixing the last two bungalows in place and beginning the task of landscaping around them.


It was such a relief to have finally got all the houses built - a project which had taken many years to bring to fruition.

We also got round to purchasing a chassis to put our 3D printed Lilla body on.

At this stage it still needed some material cleared away from beneath the saddle tank which explains why it is sitting at a very racy angle.


November

There was still the need to paint the bungalows before they could be fixed in place on the layout.

The last of them was the most challenging of the lot because one wall has stone cladding which was very well represented by Himself.


The only shame was that this effect is mostly hidden from the viewing public at exhibitions because this is the side which faces the operators.

There was more work on Lilla.

The Minitrains chassis was improved with some new slidebars from RT Models and Himself also carefully filed down the fly cranks to remove the very large balance weights.


While he was doing all that I was busy earning a little money fulfilling a promise to build some of my resin SAR wagon kits for a customer.


December

As we moved into the final month of the year Himself set to with the task of painting Lilla which we're going to finish in its Penrhyn Quarry Railway lined black livery.


Currently he is engaged in the very careful and patient task of lining it out.


The project on my workbench at the moment is to bring our WHR carriage fleet up to date with the latest of the saloons 2047 which I am building from scratch in styrene.


So all that remains is for us to wish you all the best for 2018 and thank you for visiting the blog or keeping up with what we're up to by following us on Facebook or Twitter,

We'll be taking both Bron Hebog and Dduallt out on the rode during the year ahead and we look forward to seeing you there - full details are on the Exhibition Diary page.


Tuesday, 14 November 2017

Sofa So Good

I wrote in a previous post that I was concerned that the conservatory on the back of the bungalow was going to look conspicuously empty unless we made some attempt to put some furniture in there.

Unknown to me Himself has had a go at knocking up a table and a couple of armchairs and I think he's done a jolly good job of it.


He tells me that he has also stuck an old Tiny Signs poster on the wall of the house to look like a picture has been hung up.

As you can see he has also built up the rather complex patio and steps around the back of the property.

There are other details which we might get around to adding to the scene.

When I have the time and inclination I might see if I can make something up to represent the owners' hot tub which sits in front of the French windows.

The question is whether we should model anyone actually using it?


So here's the state of play with the houses sitting in position.

In case you were curious I got an answer about how the decking was done and it turns out that Himself did indeed glue on each plank individually.


Saturday, 4 November 2017

On Level Ground

Having taken a month's sabbatical from modelling to scratch build a luxury guinea pig apartment complex (or a hutch, if you prefer) I'm pleased to report that Himself is back to work on Bron Hebog.

He has begun by preparing the ground for the siting of the final two houses of the Oberon Woods scene.


You may remember that previously this bit of baseboard had a temporary sloping cover.

Now that has been taken off and replaced with a flat base for the buildings to sit on.


The houses still have to be painted and once that's done they will be fixed in position and the land built up around them so that they sit in the landscape not on it.

Oh, and in case you were curious, here's a snap of the aforementioned hutch.


And, no, he's not taking orders!

Tuesday, 17 October 2017

Get It Right Next Time

It was very heartening to receive so many hints and tips on how to make the hipped conservatory roof after my post about being baffled by working out the shape of the end triangles without an exhausting process of trial and error.

All the solutions were obvious as soon as you thought about them for a moment, but I can be rather dense about these things.

In the end, though, I retreated to my comfort zone and made a template in plain styrene which I used to make sure the triangles were fabricated to precisely the right shape.

The first attempt ended up being far too tall, and as is often the way, making the second one was much faster because you've worked out the best way of doing it, and I got this assembled in a single evening session.


There's just some gutting to add, along with the window ledges and I think the house will be ready to hand over to Himself for painting.

And that, for me anyway, will be the Oberon Woods estate done.

Phew!

Friday, 13 October 2017

Too Tall

There's good and bad news to report.

The good news is that I've proved that I can fabricate a four-sided, sloping conservatory roof.

(And damned tricky it was at times, too)


The bad news is that it has turned out to be far too tall, or steeply pitched if you prefer.

My calculations had failed to account for the overhang and the fact that the main side pieces ended up being a little bigger than I had presumed when I drew it out.

The net result is that like the Indian continent crashing into Asia and forcing the Himalayas ever upwards the ridge line of this conservatory was forced higher than it should be.

The sides should have a much less steep profile.

It's not really realistic to try to reverse engineer what I've got here so the most logical thing to do is to start again and make the pieces smaller this time.

It was only two evenings work wasted anyway.

Wednesday, 11 October 2017

So What Now?

I may have hit my trigonometrical limit.

I've fabricated the two main pieces of the conservatory roof but now I'm left puzzling the size and shape that I will need to make the end triangles.


The problem is that in my initial calculations I didn't account for the overlap at the front and sides - where the gutter is - and so I don't feel confident that I know precisely what the height of the roof will be, and even the smallest margin of error will may leave some ugly gaps if I try to make the end pieces based only on my calculations.

Therefore I think I shall resort to doing what I usually do, which is take the time consuming, labour intensive option.

I shall attempt the glue these two pieces into a V shape and then form a template for the end pieces before fabricating the real ones and gluing them into place.

I only hope none of my former maths teachers are reading this - oh the shame!

(By the way, if you think the two pieces in the photo look wonky and not symmetrical it's just the angle the snap was take from.)

Monday, 9 October 2017

Maths Lessons

I suspect there's not a school pupil in the land who has never sat in a maths lessons and sworn that they would never ever find a use in their adult life for algebra, trigonometry or any of the other baffling formulae you get made to learn.

That is until you come to build a conservatory with a pitched glazed roof on a model railway.


I have written on this blog before about how I have always been absolutely useless when it comes to working on angles on a model.

I usually proceed by trial and error, which can be a lengthy and frustrating way to proceed at the best of times, but when it comes to these delicate styrene fabrications I would really like to cut down on the faffing about as much as possible.

So the question I was pondering was how to make sure I make them right first time.

The answer I realised one morning as I was taking a shower (apologies if that's too much information) was good old Pythagoras's theorem.

In order to work out the size of the two main pieces, so they met neatly in the middle, all I needed to do was imagine the cross section of the roof as a right angle triangle and the piece I'm trying to make would be the hypotenuse.

QED!

Well, that's the theory at least.

Let's see what happens when I try to do it.

Saturday, 7 October 2017

Offering Up

There's a little more progress with the bungalow conservatory to report this time.


I've fixed a floor in place and added the 'foundation' to bring it up to the correct height to match the rest of the house.

Just like with the previous conservatory I had to build I'm going to keep this as a separate structure until the point that it is painted and glazed before being fixed onto the side of the house.

Being at the front of the layout, and the closest of the properties to the viewing public, I reckon I may need to make a little bit of furniture to go inside it otherwise it may look suspiciously empty.

Thursday, 5 October 2017

Back To Work

For reasons that would be too boring to explain it's been nearly a week since I last sat down at the modelling desk to do any work on the bungalow.

I didn't have long but I managed to knock up the other two window frames for the conservatory and attach them to the base wall and get the three bits glued together.


This bit is simple enough so far but the challenge will come with forming the glazed pitched roof, but I'll put that off for a little while longer I think.