Monday 31 December 2012

Bron Hebog Review Of The Year

I know it's a bit of a cliche, but I thought some readers might enjoy taking a look back with me at the modelling activities of the Bron Hebog team over the last 12 months.

If nothing else it'll give you a reason to waste time when you're supposed to be working or, if you're on holiday, ignore those family members / relatives who you've spent a little too long in the company of over the increasingly elongated festive season.

January

2012 was a year when Bron Hebog re-emerged into the actual (as opposed to the virtual) gaze of the public, with two exhibition appearances booked, so January saw Himself braving the bitter chill of the workshop to crack on with scenic work on the front portion of the layout.

Goat Tunnel gained some genuinely rocky portals and liberal quantities of dyed carpet underlay were applied to the layout.


February

Himself continued working northwards, grassing over the Beddgelert station area.


Here at the Scottish end of the operation I was playing catch-up with the carriage works team at Blodge, continuing construction of my miniature version of the FR's latest Superbarn carriage 121, and helpfully pointing out to the team that their official plans for the carriage bore no relation to what they actually built....

March

There was no slackening of the pace as winter turned to spring.  Himself was now breaking new ground on Bron Hebog, building up scenery and trackbed on virgin baseboards. The Artistic Director was coerced into action once more to flutter his paintbrushes in the direction of the Cwm Cloch farmyard buildings I had made two years ago. The results - as we have come to expect - were stunning.


On my workbench I had started out on a project I'd been dreaming about for many years, scratch building a model of the WHR's infamously unsuccessful Parry People Mover.

April

And so to Sparsholt to show off what we'd achieved so far in front of the public and a knowledgeable audience of narrow gauge modellers.  The layout - or at least the one third of it we've built - ran pretty much faultlessly, no one demanded their money back so far as I know, and the huge Alsatian that was hiding under a trade stand in the corner of the room didn't eat us for lunch either. All in all as much as you could hope for from a day out, then.


May

A few weeks later we had to put ourselves out there in front of a much more critical audience - the punters at the Railex show in Aylesbury.  It's tough enough taking a narrow gauge layout to one of the big generalist shows - where the customers usually have eyes only for standard gauge or Thomas the Tank engine and little else in between - without your layout appearing to be an all-too-obvious work in progress.

The show saw the first running in turns for our Backwoods model of Linda, appearing in naked brass, and my model of the PPM also came out to play.


June

Our other veteran layout Dduallt had its chance in the spotlight, quite literally, as ace photographer Chirs Nevard trained his lens on it for a shoot for Model Rail magazine.


The previous month I had taken the plunge and bought a starter kit of resin casting materials to experiment with producing bits for some DZ wagons I wanted to make for Bron Hebog, a decision which was to have unforeseen commercial consequences.....

Himself completed his model of Linda in midnight blue livery. Nice!


July

It didn't take long from me first blogging about my intention to attempt to cast some DZ wagons in resin for folk to start asking if there was any chance I could run off some extra bits for them and before I knew it I found myself announcing that I would produce my very first kit.  What finally tipped me into it was an offer from the FR shop manager to buy a job lot and stock them among the narrow gauge modelling products in Porthmadog.

A few weeks later my first prototype broke cover.


August
The hot summer sun must have gone to my head (as unlikely as that seems given that I reside on the Clyde coast) because before the first DZ wagon kits had been produced I committed myself publicly to a follow-up kit for the NGY ballast wagons.
In another impulse move I invested some of my potential profits into one of Brian Madge's new kits for a cab-less Alice class Quarry Hunslet with the intention of using the outside frame chassis to revamp our ancient model of Britomart.


September

By this time I'm beginning to wonder what I might have started as orders poured in for the DZ kits almost as fast as the resin could be poured into the moulds. I posted a picture of the first dozen waiting to be bagged-up and dispatched.


October

While all that was going on in Scotland, at the southern end of the operation Himself had been busy with Britomart.  The original plan to graft the Madge chassis onto a Chivers body had to be abandoned and instead, with Brian's very generous assistance, he set about turning the cab-less kit into a fully enclosed engine.  I think it looks sensational.


November

Many months after the pictures were taken Dduallt finally appeared in the pages of Model Rail magazine.    

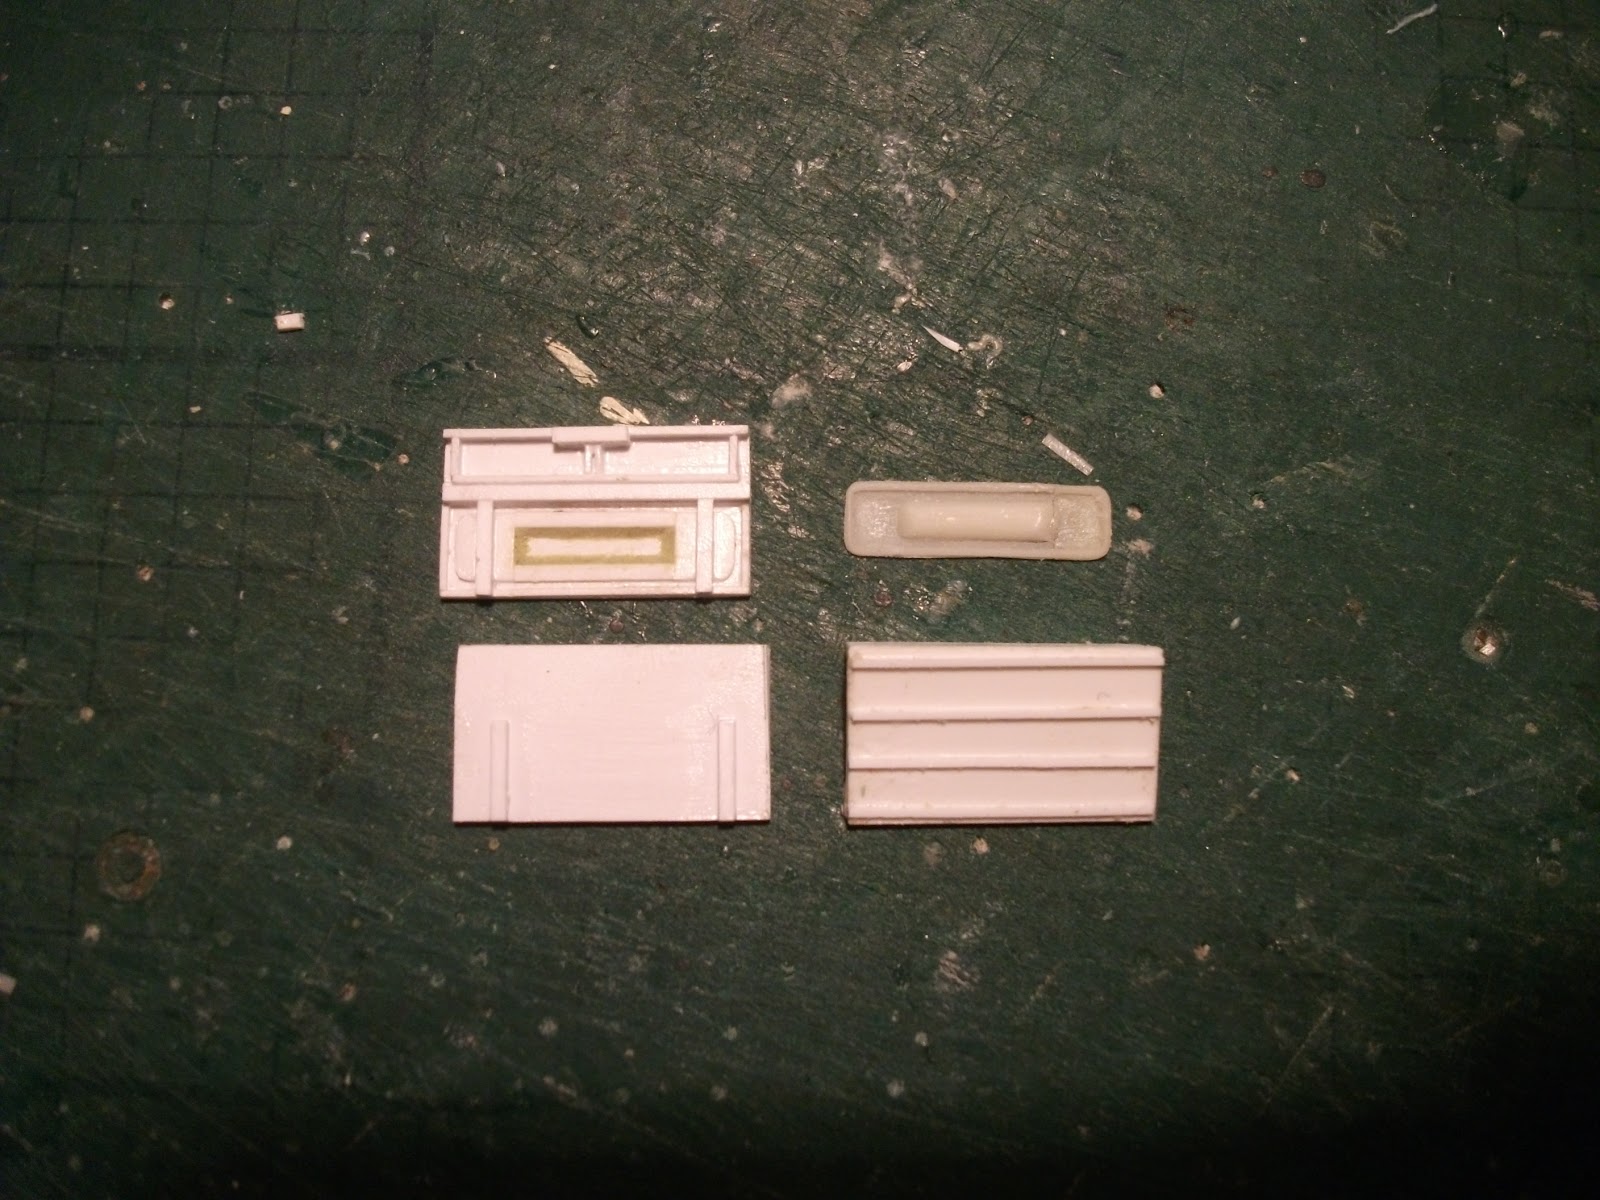
Progress on the ballast wagon kit was looking impressive although the reality was this was only the big, easy bits (the low-hanging fruit, as management types like to say) and there were still lots of fiddly, detailed bits to be designed, moulds made and test casts tried out.


December

We've rounded off the year with yet another media appearance,  Dduallt featured on nationwide TV - for all of 15 seconds - in a programme on BBC Four about the revival of the Welsh narrow gauge railways.  (Apparently borrowing our layout for an hour or so is cheaper than hiring a helicopter to get the same kind of shots - are we under-selling ourselves, I wonder?)


My range of kits continued to expand with an adapted DZ wagon kit - for the flat version of the wagons on the WHR - released as the start of the month and a start made on a kit for second generation type B wagons, due for release along with the NGY ballast wagons early in 2013.

So that was our modelling year.  Thank you so much for sharing it with us either virtually, here on the blog, or coming along to see us at exhibitions.

There are rumours that Bron Hebog may yet be going on tour in 2013 with an appearance mooted in the top left hand corner of Wales - when that's confirmed you'll read it first here.

All the best for 2013.


Saturday 29 December 2012

B Good

Here, then, is a picture of the first assembled B wagon.


I've made this prototype one up in the guise of a WHR bike wagon with the intention of keeping it to use on Bron Hebog.

It still requires various bits adding to it, such as the numerous small handrails along the bottom of the frame, but what is shown here is 95% of what comes in the kit.

This one is sitting on a pair of DZ bogies for the purposes of the snap because the etches / castings for the Bettendorf bogies (which will also be supplied with the NGY ballast wagons) are still in the process of being designed.

Thursday 27 December 2012

Santa Loves Narrow Gauge

He must do, because this is what I found under the tree on Xmas Day - a new cutting mat and a copy of Gordon Rushton's epic work recounting the story of the restoration of the WHR.


My old cutting mat was well overdue for replacement. Various accidents with solvent had left it not exactly flat anymore, which made cutting long straight lines rather difficult - unless extreme pressure was placed upon the piece you were cutting the line would often come out slightly curved. So a new one is very welcome.

The book is being slowly thumbed through. It is sumptuous in terms of text and illustrations. Indeed one might say it should be for the rather high price (£68) that the publisher has set.

But Gordon has a unique insight into the birth of the restoration project and has followed it very closely since and this thick volume is positively encyclopedic in the detail given of the historic, political and engineering aspects.

From my point of view, given the current projects I am working on, it is a shame there is no chapter devoted to the freight stock imported from South Africa, but there are plenty of pictures to peer into the corners of to discover hitherto unknown details.

I have to say that I have come across quite a few instances of typos and missing or duplicated words in my quick perusal of a few chapters, but if you read this blog regularly you'll find plenty of those here so people in glass houses etc..... (Although, of course, I'm not charging you £68 to read this...)

But let none of that distract from the fact it is a marvellous book and in my opinion anyone with an interest in the rebuilt WHR should be looking to buy one, even if they will have to save their pocket money first.

Sunday 23 December 2012

Ramping It Up

I was right all along - and now I have proof!

When I began work on the B wagon kit a few weeks ago it was my intention to produce a kit which could be customised to portray these wagons fulfilling the various roles they have had on the WHR / FR as general freight carriers, coal transporters / storers and as bike wagons.

I was pretty sure in my own mind that one of these 'new style' wagons was once employed as a bike carrier but I couldn't find any proof of that through sources such as the official stock book or the Festipedia wiki.

Fortunately Himself has come up with the goods and provided me with the photographic evidence I wanted:


This was all I needed to press ahead with designing some alternative doors and ramps which means that, should they wish, customers will be able to buy a kit with the bits to build their own models of the WHR bike wagons.

In this shot here you can compare the masters for the two styles of door.


I'm intending to build one of these as a second bike wagon for Bron Hebog, to run along with our old style version,  so even if there are no orders forthcoming for an alternative kit I won't have wasted my time and effort.

Friday 21 December 2012

Spot On

This time the rivets are going on for real.

I've applied rows of resin transfers onto the masters for the NGY ballast wagon.

Fortunately there are not too many of them and they're in a relatively simple pattern along the bottom of the frame.


You can see that I've also had a play about with one of my spare DZ castings to see if it's realistic proposition to add them onto these wagons.

By contrast to the ballast wagon there are quite a lot of them in awkward places.

Fortunately I can report that they went on very easily (they really are very good, these rivet transfers) and so I shall press ahead with putting them onto my own fleet of DZ's for Bron Hebog

I think I will probably also stick some onto the masters for the DZ kit before I come to cast the third batch.

Wednesday 19 December 2012

MOTW - 117

This carriage is now one of the older ones in our fleet, a fact given away by the rather huffed-up appearance of the windows.


It was probably one of the last carriages I built where the floor was fixed and the roof was left removable up until the point when the model had been painted, then the glazing was slipped in and the roof glued in place before the carriage received a final spray of varnish.

It is the varnish which frosted the windows which was the inescapable downside of building the carriages this way. Because we now build them with a floor which can be pulled out, and back in again, at will the glazing does not have to be inserted until after the model is varnished meaning the windows can remain impeccably transparent.

Our model shows 117 running in the push-pull set in the mid-1990s. 

It had recently had a comprehensive rebuild that saw all the pillars rearranged and reduced in number so the narrow, vertical drop down windows it was built with in 1977 were replaced with the bigger, bus-style, design with the sliding openings at the top.

This made the carriage look very much like 121, which was the last of the six 'tin carrs' built at Boston Lodge in the late 70s and early 80s, but inevitably the two were never identical.

In the fullness of time I will have to get around to making another 117 to run on Bron Hebog along with the rest of this set.  Running the green and ivory livery on the WHR would be stretching modeller's licence too far, methinks.

Monday 17 December 2012

B Wagon Progress

Keeping up with demand for the DZ wagon kits has kept me busy the last couple of weeks casting the component parts but I have found some time to make a little more progress on the follow-up B wagon kit.


I mentioned in a previous post that I'm going to cast the central doors separately, to make it easier to produce other versions of the WHR B wagon like the bike wagons and the coal wagons employed on the FR, and you can see in the picture above how that's going to work.

In their original form the B wagons have a similarity to the DZ wagon with the depressed panel on the lower part of the door.

I had hopes that I would be able to cheat and employ a casting from one of my DZ wagons but it didn't really look right, so I've made another one from scratch using laminated styrene and some Milliput to create the effect of an indentation.

At the right hand side you can see the master for the end piece taking shape.

The next step will be to drill marker holes for the many grab handrails along the bottom of the frame which kit buyers will be able to add to their models should they so wish.

Saturday 15 December 2012

A Riveting Read

To my utter astonishment the rivet casting experiment has been a complete success!

I poured the moulding compound onto a few test rows of rivet transfers a couple of weeks ago fully expecting them to be pealed off from the styrene when I attempted to remove the set silicone.

I was wrong.  They stayed stuck fast, from which I tentatively conclude that treating them generously with decal fix, followed by a coat of clear varnish, may be the solution to my concerns.


Flushed with success I have decided that I am going to try applying  these rivets to the masters for my forthcoming NGY ballast wagon and B wagon kits which should enhance them even further.

Lets hope this test piece was not a fluke and it will work just as well on proper masters.

Thursday 13 December 2012

MOTW - 123

101 was always one of my favourite FR carriages - it was the first model I scratch built 20+ years ago - so I was delighted when it was given a reprieve and reincarnated as a 3rd class, top end, observation carr.

I didn't waste any time creating a 4mm version of 123 (as it now is known) to run on Dduallt and Bron Hebog.


Apart from the obvious difference of being turned 180 degrees to face Blaenau, 123 had a number of alterations to the bodywork which meant it wasn't an option to merely recycle one of my existing models of 101 (As we did with 100 when we modelled it in its final days as a mess coach on the WHR construction.)

There were some extra windows cut into what were previously blank panels in the guard's compartment and when the old windows were replaced with double glazed units it meant they lost their rubber seals which gave them rounded corners, and instead became square.

The interior was completely re-designed with 3rd class seats replacing the swivel seats and Pullman armchairs from its days as a 1st class carriage.

The sight of an Observation Carriage at the top end of an FR train set still takes some getting used to, especially with a Double Fairlie at the head of the train as in this scene from Chris Nevard's photo shoot with Dduallt. At first glance you could be forgiven for assuming you're looking at a Down train.

Picture copyright Chris Nevard / Model Rail magazine

The best time, perhaps, to be sitting in 123 would be on an Up train hauled by Linda when you'd get a perfect front row view of all the action on the footplate - even better when she's eventually converted back to burning coal.

It would also be the best place to ride when an FR set is being used on the WHR, being at the back of the train as you travel towards Caernarfon.

Tuesday 11 December 2012

Lemon Aid

One of the great things about building your own models - as opposed to buying them off the shelf - is that you never stop learning, and so much of the new knowledge that comes your way is from exchanging ideas and experiences with other modellers.

And so it has come to pass that after more than 20 years of scratch building I have discovered a new glue.


Limonene may be old news to you, perhaps, but I have to confess I only came across it for the first time a couple of weeks ago when reading a new 'how to' publication from fellow modeller and blogger Phil Parker. (There's a link to his blog at the side of this page.)

He wrote about how it was a much milder form of solvent which was ideal for laminating styrene because it wouldn't attack the plastic so much and cause it to curl as it cured.

Until now I've been using Mek Pak and other similar chemicals for bonding styrene and have got quite accustomed to my workpieces bending like prize bananas within a few hours, and I  have adapted the construction of my models to anticipate this tendency.

I read what Phil had to say, thought: 'that's interesting', and did no more about it until I was buying another consignment of resin casting goo from Hobby Holidays' website, saw them offering bottles of Limonene and made a spur of the moment purchase.

(Incidentally, I must record what fabulous service I've always had from this firm. Place an online order at 4pm and you'll find your consignment on your doorstep the next morning!)

I've used Limonene for the first time on the masters for the B wagon kit and I have to say my first impression is that I'm very impressed.

It's non-curling properties are all that Phil promised they would be, although on the flip side it does take considerably longer to fix the parts to one another and you do have to be careful not to disturb the bits you have just glued as you continue working on the piece, unlike with more aggressive solvents like Mek Pak where you get a good, solid bond within seconds.

As its name suggest it is a product derived from citric acid, and unlike most other modelling solvents which can give you a headache, this has a very pleasant aroma of orange / lemon zest, as does your model until it is fully cured.

Sunday 9 December 2012

B Different

I've started work on my fourth kit, for the ex-SAR B wagons found on the WHR.

There is already an etched brass kit for the B wagon on the market produced by Worsley Works, but being the WHR nothing is ever straight forward.

South African wagon spotters will be all too aware that there were two kinds of B wagon imported to Wales - and it is the revised type which I am going to be offering.

Here is one of them seen getting a makeover in the goods shed at Dinas.

Picture: M Ingram

There are numerous detailed differences but the most obvious are the extension to the sides with the angled cut at the bottom and the two big thick bars across the ends.

There are also fewer rivets in evidence on the frame and the vertical L section straps are fixed the opposite way round to the earlier type.

According to reports from unofficial sources another six of these design of B wagons are in the process of being imported from South Africa for the WHR so by my calculations that means there will be an equal number of both types on the railway.

Below is a shot of initial progress on the master for the side of the wagon,


You have probably noticed the absence of the drop / swing doors in the centre.

Having the door as a separate casting means modellers who wish to show this type of B wagon being employed to carry coal for the locomotives on the FR can easily chop off the top set of swing doors from the casting before assembling the sides.

I hope it may prove as popular as the DZs and the NGY kits have been.

Friday 7 December 2012

Dduallt On TV - Monday 9pm

Our 009 layout - and Himself - will feature in a programme on BBC4 on Monday night.

Dduallt was filmed for the programme called The Golden Age of Steam Railways a few months ago.


The programme will tell the story of the revival of the Festiniog Railway and the great Deviation project of the 1960s and 1970s. The producers asked to use our layout to explain how the spiral was constructed by the Deviationists at Dduallt and give viewers a better appreciation of the scale of what was acheived soley by volunteer labour.

The camera wasn't just trained (geddit?) on the layout because they also filmed interviews with Himself, and he'll be watching nervously to see how much of his contritbution made it through into the final edit.

You can read more about the prgramme here on the BBC website.

Please do let us know what you thought of it.

Wednesday 5 December 2012

MOTW - Bug Box 4

I've got one of the more lurid FR liveries for you this week.


I suppose some people with a more casual association with the FR might presume this purple colour scheme is a result of modeller's licence, but it is not. Here is the proof:


It's quite remarkable how in two decades the FR made the transition from a railway that gave BR's corporate blue livery of the '70's a real run for its money it terms of dullness and monotony to one which, for a short period in the late 90's, appeared to be painting its rolling stock in all colours of the rainbow.

Small Birmingham number 4's post-rebuild livery was certainly one of the more unusual.

The situation has settled down a lot more in recent years with most rolling stock either wearing the regular maroon / ivory livery or one of a more rationalised range of heritage colour schemes.

Today number 4 wears the rather unremarkable green with red ends scheme of the Col. Stephens era - not a personal favourite, I must say - so I'm quite glad that our Chris Veitch brass bug box looks a little more interesting.


Monday 3 December 2012

Going Dotty

A little experiment while I am between bigger modelling projects.

There's not much more can be done on the ballast wagons until the bogie etches and other bits arrive and the second batch of DZ wagons has been cast and posted off to customers.

So I'm having a play about to see if there is a way of using resin transfers on a master for a casting.


Using the resin transfers isn't difficult. In fact they are a complete joy. No, the issue about whether they are any good or not is because I fear they will be ripped off when I come to peel the silicone mould away from the master.

It's perfectly possible that I could dig the rivets out of the mould, one by one, but I couldn't then use the master again until I had re-riveted it. That would be rather tiresome, to say the least, because on a popular kit I may have to manufacture three or four moulds.

So I'm going to pour a little RTV over these and see what happens.

I have applied the transfers in the usual way, brushed fixing solution over them twice and also now given them a coat of clear varnish.

So, blog-readers of the world, what are your predictions for what's going to happen?

Saturday 1 December 2012

Xmas Bonus

As we begin Advent I've come up with a stocking filler for 009 modellers - a kit for some of the WHR's fleet of DZ flat wagons.


Following a request from some of the customers who've bought my first kit for the DZs, I have made some simple alterations to the existing masters for the drop side wagon to represent the others at Dinas which have been stripped of their doors.


As usual with FR / WHR matters these wagons have many variations. This kit shows the examples which have retained the cast door stops. Others have more basic bent plates to perform the same function while some now have none at all!

As ever you can contact me on the Boston Largs Works email address if you're interested in this kit.