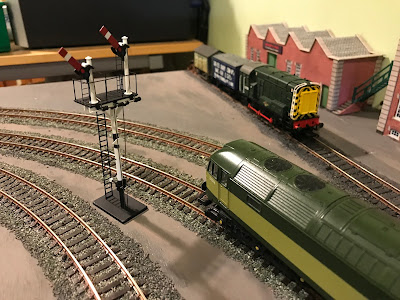
As well as work on the Minffordd project there are still occasional developments on the 'test track' at home.
If you're going to have a 'test track' then there's no harm in doing a little scenic work to turn it from something purely functional into a more of a feature in the room.
However, it is definitely not a layout for boys, big and small, to play with, wipe that thought from your minds..
I've been tempted to try out some of the Dapol working semaphores and decided now was the time to splash out on an LMS bracket starter signal for the inner loop.
These beasties are motorised with a chunky box containing the servos to move the mechanism, and include a rather nifty bounce function when the signal arm goes down.
I watched a selection of the review and fitting videos you can find online, and then when the signal arrived I thought I would give it a wee test on 'dry land' to see how it all worked.
Which is where the problems started.........
The fit the signal on a layout the base simply clips onto the bottom of the treaded tube which you insert into a 15m hole drilled in the baseboard.
The signal comes complete with a pair of switches which have wires already fitted, and plugs on the other end which push home into the side of the base unit.
These are not long enough to stretch to where my control panel is.
You can buy extension kits but what I intended to do is to splice in some extra wire so it goes the distance.
Anyway, back to the test.
I clipped on the base, plugged in the control wires, hooked it up to the power and had a play - and was very impressed.
And then I went to take it apart again.......
To be fair to Dapol, there is nothing in the instructions which tells you how to remove the servo base, but equally there is nothing written to say that once it's on you can't take it off again.
Well, it certainly doesn't unclip as easily as it clips on, and eventually when I tugged at it hard enough - holding the signal by the threaded tube not the post - as the base came free it ripped off the mechanism to the left hand signal, which flew off in all directions.
The part that I couldn't find anywhere in the room was the cover which goes over the balance weight arm and holds everything in place.
Without it the control wire mechanism simply falls off and the signal arm stays stuck in the raised 'off' position.
It was a very tricky job, too, to reconnect the mechanism, but I was forced to come to the reluctant conclusion that I had wrecked a rather expensive accessory within 5 minutes of opening the box.
My family will attest that I was in a very bad mood for the rest of the evening!
Blatantly courting sympathy I posted about my mishap on our club Facebook group and received some helpful suggestions about possible repairs, and I chewed these over in my mind over the course of the next day.
Returning to the workbench I examined the broken signal again and noticed there was a little bit of metal peg sitting proud of the balance weight arm.
Thinking about it some more I realised that the servos operate the signal mechanism much slower, and more gently, than I was doing with my fingers.
My hope was that if I could put some sort of retaining cover over the pivot it might not need to resist too much sideways force.
Rather than attempt to glue a piece on I thought I would first try drilling a very small hole in a piece of styrene strip to see I could make it a resistance fit onto the peg and hold the mechanism in place.
It did fit, and what's more it seemed to stay in place even through some vigorous manipulation of the mechanism.
So I made another one, and shaped it to something like the original cover, pressed it into place , adding a dab of superglue for luck, and painted it matt black to match.
Now, as you can see in the picture at the top of the post, the signal is in place on the layout.
It still does not have the servo base attached.
I won't do that until the wires and been extended and the switches mounted in the panel, because I am quite sure that once that base is clicked on again I will not be able to risk a second attempt at removing it without wrecking the signal even more.
And we shall see how long my repair holds out for.............


