Saturday 30 December 2017

Review Of The Year - Part 4

For the last post of 2017 I'll bring our modelling review of the year up to date.

October

Himself was steadily getting on with the top coats on the Superbarn 118 between other jobs.


He had many tasks on the go including fixing the last two bungalows in place and beginning the task of landscaping around them.


It was such a relief to have finally got all the houses built - a project which had taken many years to bring to fruition.

We also got round to purchasing a chassis to put our 3D printed Lilla body on.

At this stage it still needed some material cleared away from beneath the saddle tank which explains why it is sitting at a very racy angle.


November

There was still the need to paint the bungalows before they could be fixed in place on the layout.

The last of them was the most challenging of the lot because one wall has stone cladding which was very well represented by Himself.


The only shame was that this effect is mostly hidden from the viewing public at exhibitions because this is the side which faces the operators.

There was more work on Lilla.

The Minitrains chassis was improved with some new slidebars from RT Models and Himself also carefully filed down the fly cranks to remove the very large balance weights.


While he was doing all that I was busy earning a little money fulfilling a promise to build some of my resin SAR wagon kits for a customer.


December

As we moved into the final month of the year Himself set to with the task of painting Lilla which we're going to finish in its Penrhyn Quarry Railway lined black livery.


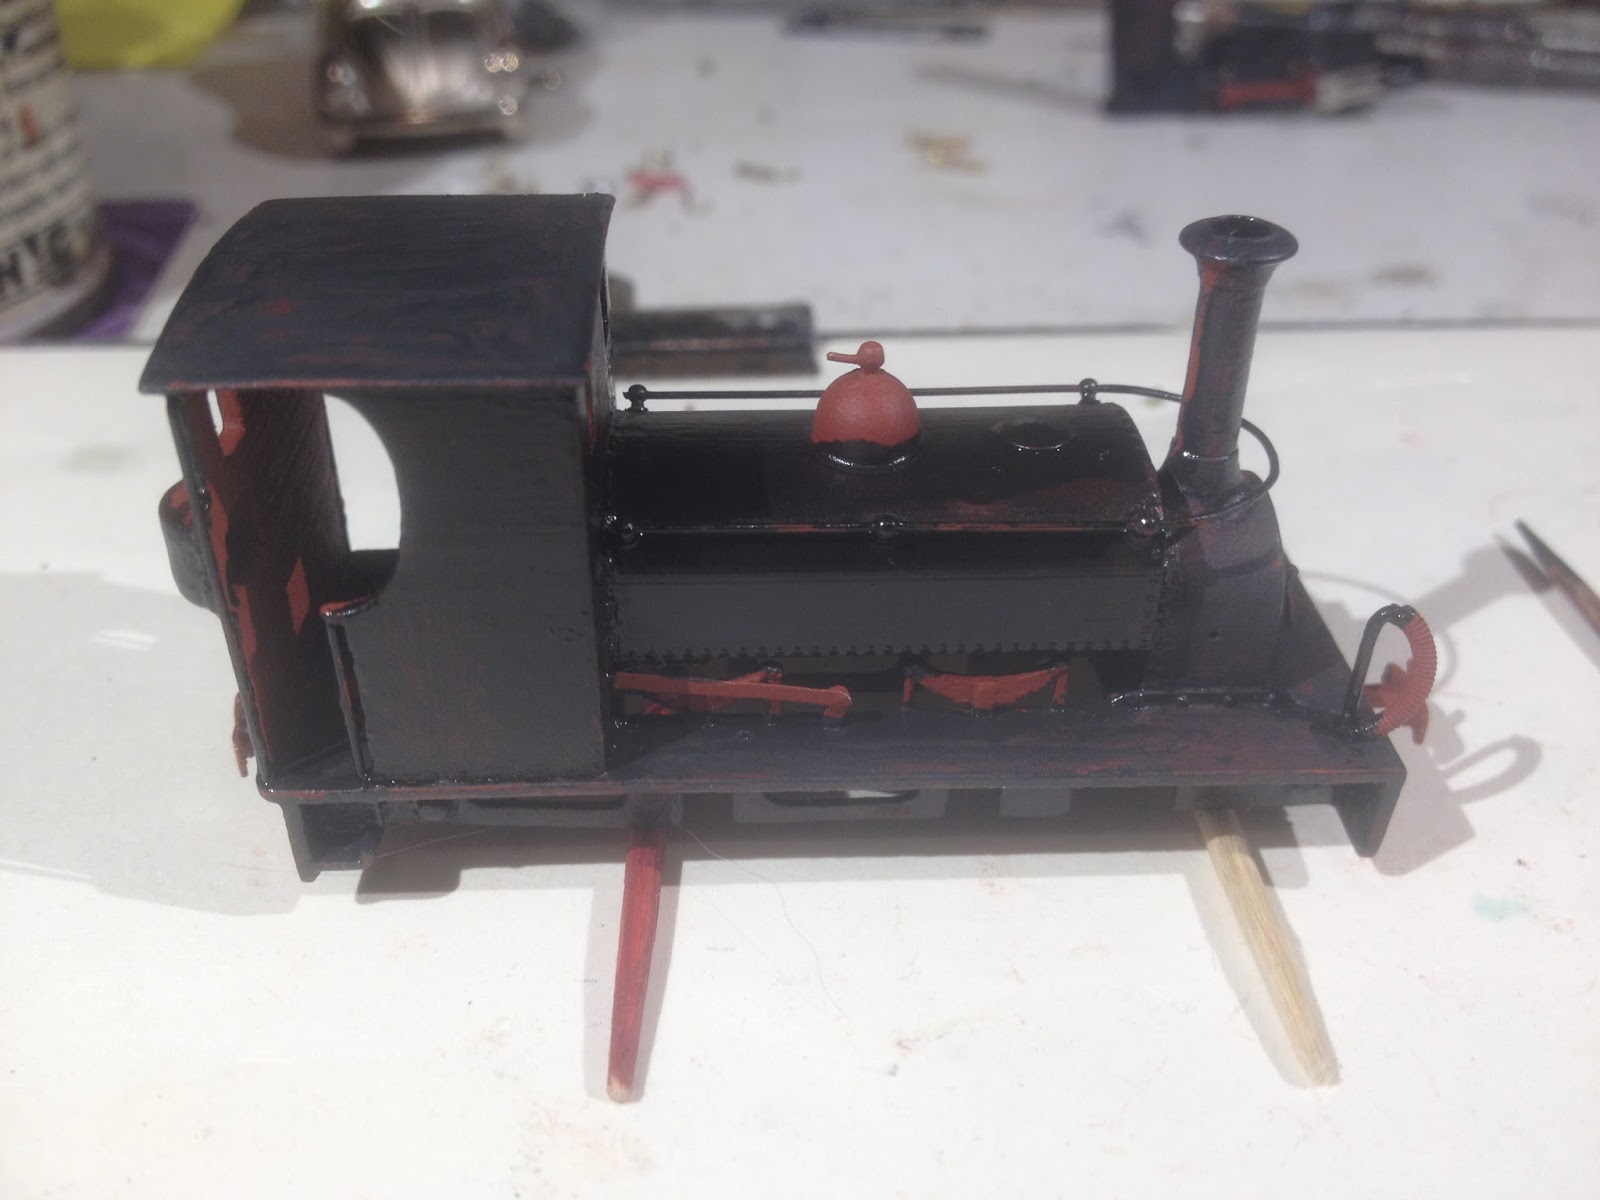
Currently he is engaged in the very careful and patient task of lining it out.


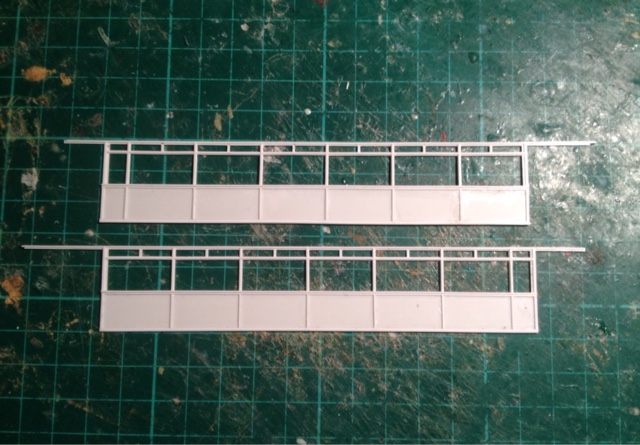
The project on my workbench at the moment is to bring our WHR carriage fleet up to date with the latest of the saloons 2047 which I am building from scratch in styrene.


So all that remains is for us to wish you all the best for 2018 and thank you for visiting the blog or keeping up with what we're up to by following us on Facebook or Twitter,

We'll be taking both Bron Hebog and Dduallt out on the rode during the year ahead and we look forward to seeing you there - full details are on the Exhibition Diary page.


Thursday 28 December 2017

Review Of The Year - Part 3

July

The early part of the summer was taken up with work on the housing estate scene.

The conservatory which I had to build for the back of the latest house was one of the more challenging bits of the estate I've had to make.


Himself had been doing some work on the gardens of the houses which are already in place on Bron Hebog.


He'd also been busy creating the cemetery above the crossing on the far left hand side of the layout.


August

I decided to take a break from house building and put together the castings for Superbarn 118 which I'd cast the previous year but kept stored.


Himself was also giving some attention to the scenery on the top of Goat Tunnel, planting a copse of trees.


We also made a start on the last major scenic challenge on Bron Hebog which is lining the Cutting Mawr at the back of the layout with rock.

Instead of using slabs of real rock, which is what we did on Dduallt, we've decided to try casting copies of sections in resin which will be lighter and make the layout slightly less heavy.


September

By this time I'd started work on the last two houses to complete the Oberon Woods estate scene, both of them are detached (mostly) bungalows.


Himself had a few models which needed priming and decided it was time to give our Welsh Pony a coat.


The photo was taken in black and white - if it was in colour you would see that the primer is actually red oxide.

We did use grey primer as the base coat of the new Superbarn 118 which was ready to start being painted.


It's seen here on the shelf in front of some of the Superbarn fleet including the service car 125 and the observation car 150.


Tuesday 26 December 2017

Review Of The Year - Part 2

April

At the start of the year Himself had begun painting our Britomart, a few months later it was finally lined out and had its name and works plates fitted.

The finished effect was terrific!


He was also making the finishing touches to another model which featured in our January review, the service car 125, which had received a coat of varnish and was ready to join the fleet.


I had made rapid progress with the latest house for the estate scene which was looking pretty much finished.


Or so I thought.....

May

Yes, I spoke too soon.

I had to pull it to bits in places because I'd come across an aerial picture of the estate which showed me aspects of this house which I had never noticed before, including an entire extension on the back.


Fortunately with styrene it's easy enough to splice in new bits.

Yet another long-term project came to fruition this month when our model of observation car 150 had its (very complex) lining finished and the glazing added.

It was so impressive I had to take some portrait shots on Bron Hebog.


June

Our attention in the early months of the summer was all about the estate scene.

The house which you saw me building earlier in the review was ready to be tried out in place on Bron Hebog.


Around the same time I was already well on the way to filling the gap site at the top of the picture with one of the more interesting houses on the development - which is saying something given the unconventional shape of many of them.


We'll begin looking at the second half of the year next time.

Sunday 24 December 2017

A Christmas Message

With thanks to Richard Marsh and FRCo for permission to reproduce image

Friday 22 December 2017

Review Of The Year - Part 1

Let's face it, there's not a lot of modelling gets done in the run up to Christmas, so I've got into the habit on the blog of taking stock of what we have achieved over the course of a year.

Quite often I end up surprising myself with how much has been done, because progress on a model can be such a haphazard affair that you sometimes don't realise how many things you have been working on over the period.

January

At the start of the year Himself was putting the finishing touches to our scratch built model of the new FR service car 125.


A few miles down the coast I was starting work on one of the more obvious missing pieces on Bron Hebog - the ruined barn which sits in the middle of the S bend.


And after many years sitting in primer Himself got around to painting the exquisite model of Britomart which was built up from a Brian Madge Quarry Hunslet kit  (which are sadly filed under H for Hen's Teeth currently, more's the pity.)


February

There were other locomotive loose ends which Himself set about tidying up earlier this year, including the long-standing issue we had with the wheels on our Welsh Pony.

This model was built - with extreme difficulty! - from another now unavailable kit  (do you spot a trend here?) and the problem was that one of the wheels on it was slightly less than round.

Our little pony ran with a nasty limp.

Fortunately, one of my contacts who knows the manufacturer was able to obtain a replacement set of wheels, for which we are most grateful.

Himself pulled the chassis part and replaced them, with the result that it now runs much more satisfactorily as you can see below.


Which is more than can be said about the real Welsh Pony! (Patience is a virtue...)

As milder weather arrived he ventured into the garage and began scenic work on the layout again, making a start on the scale miles of post and wire fencing alongside the line.


I was very taken with an overhead shot he took of the farmyard area, which I think showed off the subtlety of the scenic work he's been doing.


March

While that was going on Himself had been painting the old barn which was ready to be tried out in position on the layout, and looked very effective.


We'd also taken a radical step into a new technology: 3D printing.


For his birthday I bought him a copy of the Robex design for the unique Quarry Hunslet Lilla which I had been admiring for some time after seeing pictures of models which other people had made.

Until now all our locomotives have had brass or white metal bodies.

Himself found that bits fell off this one from virtually the first time he held it, which didn't do much to endear him to the medium.

On my workbench I had begun another stretch of house building with the intention of finally finishing the Oberon Woods estate scene.


To be continued after Christmas.

Wednesday 20 December 2017

Pale Blue Lines

Himself has been hard at work lining out Lilla in Penrhyn livery.

It's a two stage process starting with the pale blue lines on the outside.


For this he's using the water slide lining sets from Fox Transfers which come with sections of straight lines and corners of various radii.

The biggest challenge on this engine I suspect is the back cab sheet.


He's about to begin with the red and I look forward to posting some snaps of that soon.

Sunday 17 December 2017

Panel Show

I was left alone for an entire weekend (albeit in some charge of the youngest in the family) so I had an evening to fill.

Sometimes when you are faced with an open goal it's hard to decide what to do and I was torn between starting work on the doors and the ends of the WHR saloon or adding the panellling to the sides.


In the end that was what I decided  to do.

It was a close run thing, though, because I only had just enough of the finest size of strip.

It's too close to the festive season to order more online so I might have to raid Himself's stocks again.

Thursday 14 December 2017

Carriage Progress

No visit to Himself's place is complete without popping into the study to inspect progress on the workbench.

Last time I observed further coats of red and ivory have been applied to the latest superbarn 118.


There's not much more painting required now but Himself has still to face his least favourite job which is fabricating and fitting the large handrails either side of the doors.

The pleasure at getting this carriage almost ready to join the fleet is tempered by the knowledge the carriage builders in Wales are already putting the next one - 120 - together.

Tuesday 12 December 2017

Bells And Whistles

The latest FR magazine arrived through the letter box the other day which is always a good thing.

I was pleased to see it came with a new leaflet making an appeal for the funding to finish the restoration of Welsh Pony, which is something I called for on this blog a couple of months ago.

(Not that I'm taking any credit, I'm sure the wheels were in motion anyway.)

It was also making the case for cash to pay for all the bits to build the new James  Spooner, complete with ornate bells, without robbing the mortal remains of Earl of Merioneth as it goes into its enforced hibernation.


There was a statement in the leaflet that struck me as a little odd, though.

It explains, in not so many words, that the Earl is knackered and needs a new boiler, new tanks and new carrier frame.

Therefore, it says, it makes sense to use these new parts as the basis for a brand new locomotive.

How so?

I get that these parts are the basic ingredients of a Fairlie superstructure, but why does it 'make sense' to designate it as a new locomotive?

Why not consider it a rebuilding of the Earl, (in its existing shape, of course) in the best FR tradition?

It is the precise opposite of the logic of the Welsh Pony project.

With that engine requiring a new boiler and new frames critics have asked why not have left the original alone and called the new one Little Giant?

I can't help thinking that the James Spooner project only 'makes sense' if you start from the assumption that all Fairlies should be curvy and not angular like the dear old 'Square'.

That said, what does make sense about the appeal, and is the reason I endorse it, is that it will ensure that my favourite Fairlie will be kept intact and not suffer the indignity of Livingston Thompson, which was unceremoniously dumped, denuded of all its ancillaries, resting on a pair of slate wagons for a decade and a half before it was done up for display.

I know there are many of us who are determined 'the mighty square' will return to action one day, and your support of this appeal will make that more likely.


Sunday 10 December 2017

Sticky Business

Painting of Lilla continues, slowly.

In fact there's been an element of un-painting with sections of slightly dodgy paintwork rubbed down again.


Himself has come to the conclusion that perhaps the printed body hadn't been cleaned enough before it was primed.

It certainly wasn't dunked in white spirit as some readers have suggested.

Oh well, no shame in admitting to a beginner's error because it's our first time with this 3D technology.

I'm the meantime various bits have been painted red such as the buffer beams, springs and reverser.

First Two Sides

I can't remember the last time I had a midweek day off to myself, but my employer insists on a use-it-or-lose-it policy on annual leave so who am I to argue if I've got a few days to use up before the end of the year?

A whole day to yourself - or at least the bit in the middle when the kids are at school - is the ideal time to tackle a job like making the first layer of a carriage side out of styrene because it's not the sort of task you can stop half way through.


It took me longer than I would have liked to make the first side because I reckon it's at least a year and a half since I last did this, when I was making the masters for the observation car 150.

The second one was a lot easier once I'd rediscovered the knack and probably took less than an hour.

In case you're wondering why the cant rail is extended at each side, or where the doors are, it is because the larger WHR carriage design has entrance vestibules which are inset much more so than on the FR's superbarns and they will be made up as separate parts to be joined to it further on down the line.

The next stage is to add the second layer of beading detail, but for the moment they are being stored nice and flat in traditional photo album until I have a few hours free again.

Friday 8 December 2017

Spoiler Alert!

So it turns out our Lilla is indeed going to be finished in black.

I popped over to Himself's place at the weekend to discover that he'd grown impatient waiting for a response from me (it appears he was expecting this almost instantly) and has given it a first coat of gloss and matt black.


He's grumbling a little about the time it is taking to dry and wondering whether this is something to do with the 3D material, but this seems a little odd to me given than it was primed first.

He's also decided that we're going to do it in fully lined Penrhyn livery, which is just as well seeing how he's the one who's going to have to do it.

In my role as arbiter-in-chief of colours I helped him sort through his vast collection of part-used packs of Fox Transfers sheets to find out what he needed to order and left him to it.

This could well be a three pairs of glasses job!

Wednesday 6 December 2017

In Reverse Order

The first bit of work on our next WHR carriage - the latest 3rd class saloon 2047 - are the parts which I would usually leave until towards the end of the build.

I've cast the seat and table units for the interior using a mould I developed for the previous carriage, 2046, which is something I hit upon when I was making a job lot of FR Superbarns.


The reason I've begun with the inside rather than the body sides is that I was waiting for Himself to bring over the model of 2046 so that I could remind myself how I built these WHR carriages.

All that needs to happen with these castings is for the table tops to be glued onto the uprights and then they'll be put to one side until I've got the body shell ready to receive them.

You can also see at the top of the image that I've also cast the detailing covers for the bogies.

These slip over a pair of the SAR diamond frame bogie etches I use in my wagon kits but these castings are adapted to represent the extra suspension and the roller bearings which are now standard on the WHR carriage fleet.

I can't make the bogies up just yet because I'm waiting on a new delivery of bearing cups and wheels.

Monday 4 December 2017

I See A Red Engine And I Want To Paint It Black?

With apologies to Sir Mick and Keith, but it appears I have a decision to make with regards to our Lilla.


Himself has been adding a few brass embellishments to the 3D printed Robex body, such as the handrails and whatever it is on top of the dome.

(UPDATE: since this was posted a reader has got in touch to tell me it is a regulator lubrication valve. Every day's a school day.)

I get the impression he finds working with this inherently brittle material rather stressful compared to brass or white metal.

(His last email to me began with the words 'before I wreck it completely....')

Those of you who are familiar with the Minitrains chassis which is used on this kit will notice what a good job he's done reshaping the fly cranks so they no longer have the big counter weight on them.

He has also made use of a handy etched fret from RT Models to replace the slidebars and the original, and rather chunky, couplings have been changed as well for brass ones.

So now he's asking me about my preferences for painting it?

It seems to me we have three choices,

For a while on the FR it ran it plain black livery.

(I'm sure he'd be delighted if we plumped for that.)

Then for a long while it was in lined out Penrhyn Quarry Railway livery, and last winter it emerged from Boston Lodge in the rather natty Cilgwyn green.

What do you all reckon?


Saturday 2 December 2017

Square Go

I had a trip down memory lane a couple of weeks ago when a friend revealed he is planning to make a model of Earl of Merioneth aka  'The Mighty Square' using one of the Langley white metal kits as the starting point.

I told him that this was how Himself built the first of our models of it around 25 years ago, so I thought it might be nice to dig it out for another look.


The key to our model was that we used as much of the Langley kit as we could as a solid base to build up the magnificently modernist (and under-appreciated) superstructure of the Earl.

So beneath those iconic side tanks, which were cut out of styrene, is the outline of a curvy Spooner Fairlie.


One of the things that made this a 'no brainer' is that the Earl's tanks are flush with the bottom of the superstructure whereas the traditional design has a lip which makes provides a very secure footing for the overlays.

We also filed down and reshaped the one-piece casting for the cab roof and cut a hole for the luxury sunroof.

For the very plain D shape smokeboxes and the chimneys we obtained examples of the white metal castings from the Dundas kit for Linda and Blanche.


All these pearls of wisdom were duly passed onto my friend who is blogging about the progress on his own model.

My reward for all this assistance was the publishing of a scurrilous slur which suggested that this faithful old model was withdrawn from service and replaced another built using a Backwoods kit because it was unreliable!

I feel compelled to set the record straight and state very clearly that this model, powered by an adapted Bachmann chassis, was epitome of reliability.

Let there be no doubt that the primary motivation for the construction of a second Earl was the absurdly small wheels on the old diesel chassis.


To even suggest that Himself would accept an unreliable locomotive is tantamount to a defamation or the worst kind.

So there!