I bet we've all got them, haven't we? Those modelling projects sitting in a box which you say you will get around to one day.
This pair are one of mine.
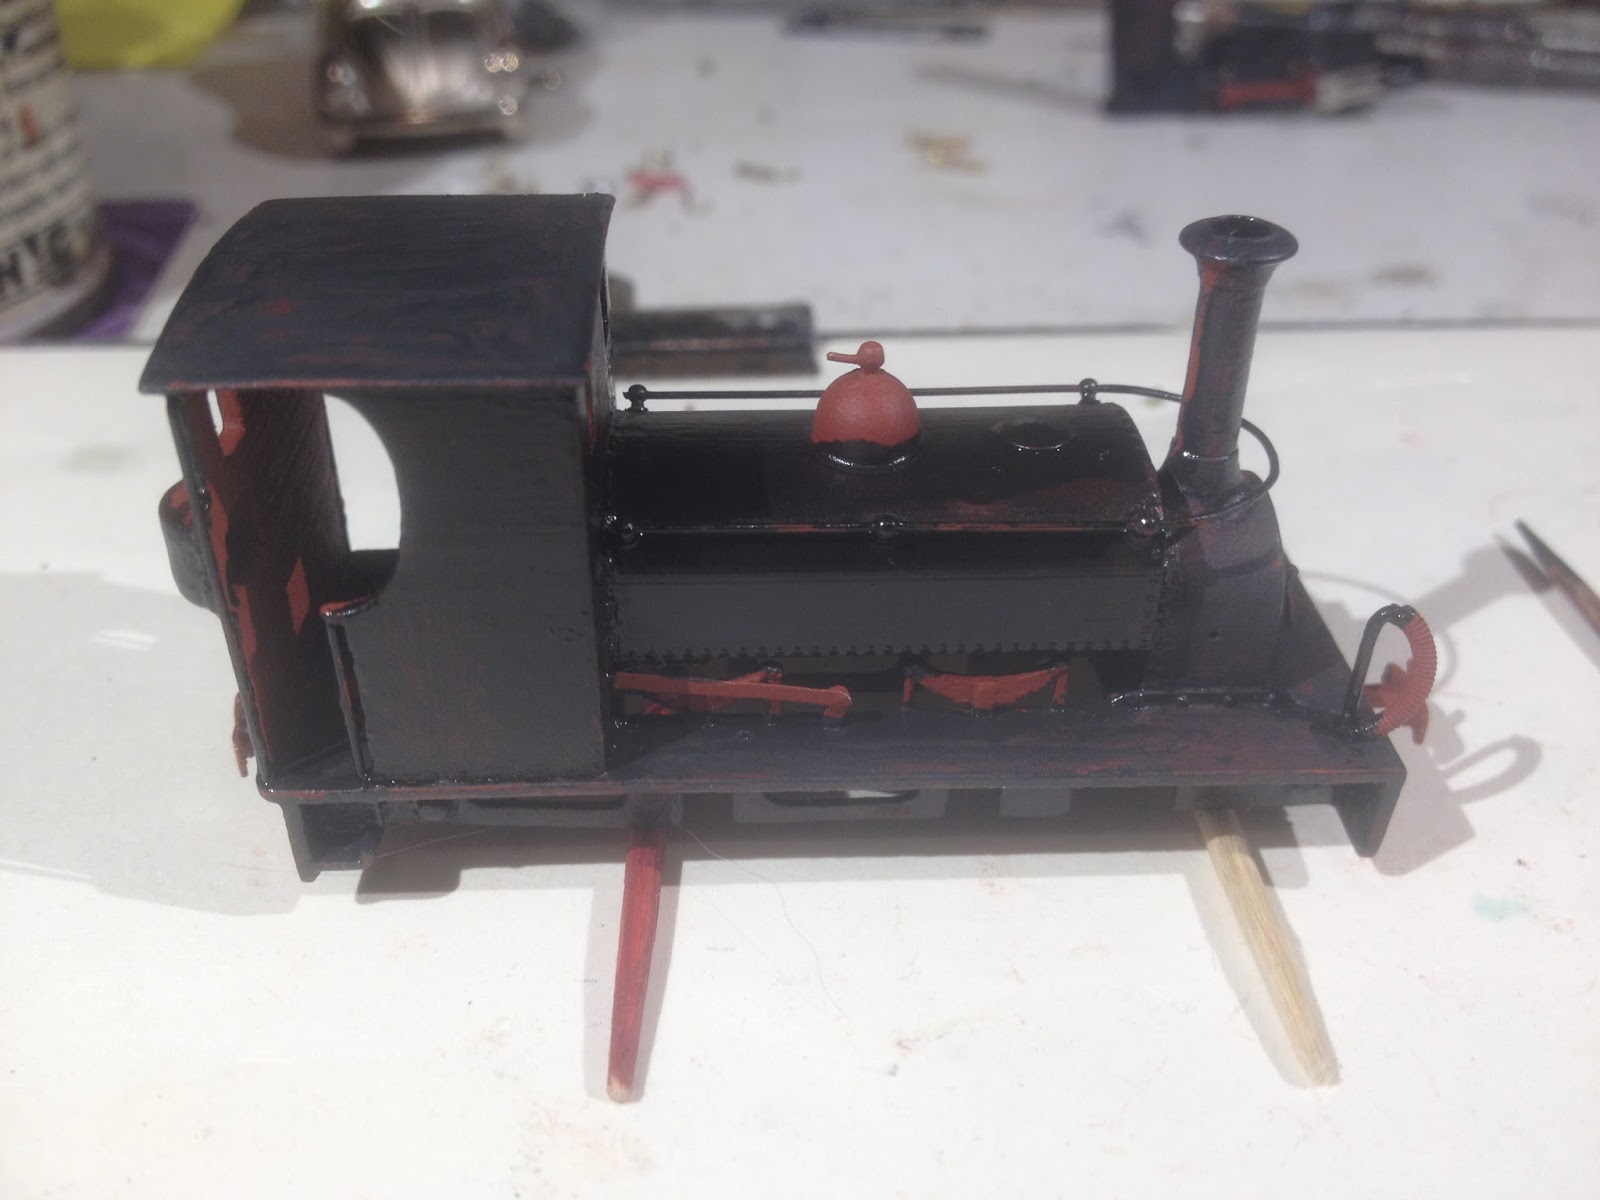
If you don't immediately recognise them from their ghostly resin appearance, they are 3D prints from Robex of bodies for the Manning Wardle tank loco Jubilee 1897.
And if you know something about the history of that locomotive you may wonder what my interest in them would be.
There is is tangential connection to the FR in that it started out working at the Cilgwyn quarry alongside Lilla, and made a fleeting trip along the Welsh Highland as part of a transfer move to the Penrhyn quarry.
But the reason I have them is nothing to do with rolling stock for Dduallt, Bron Hebog or Minffordd.
A couple of years ago when I was developing my home dual gauge test track - which turned into a full-blown layout - I was looking for a couple of small tank locomotives which would look at home on the small narrow gauge loop which is done up like a very small scale tourist railway.
I was very impressed with the smooth performance of the Minitrains outside framed F&C chassis which powers our Lilla (also a Robex print) but I found the slight more chunky look of the Manning Wardle loco more attractive.
I've always intended to get these bodies mounted on a pair of spare F&C chassis we have in stock, but it's one of those things that I've not got round to.
Or more accurately, Himself has always had to much to be getting on with that it seemed unreasonable for me to add to the backlog by asking if it'd mind taking a look at them for me.
As well as the chassis I ordered in the other parts we'd need, such as the etch for the motion and slide bars.
I'd even had a couple of name plates produced because I intended to finish them in freelance liveries and name them after my children. (Very soppy for a serious prototype modeller, I know.)
I wonder, however, whether this might be a good moment to suggest the idea to Himself, because we get seriously drawn into the Dinas project.
And I also suspect he might be quite glad of another excuse not to have to try to sort out the knotty problem of how to attach valve gear to the NG15 chassis which is sitting on the workbench taunting him...
I've established a tradition on this blog in the last days of December of taking stock of everything that Himself and I have achieved over the year.
I usually find there are things that I've forgotten about, and I'm always surprised by how much we've got done.
So here's a look back at what we were up to in the first quarter of 2018.
January
Looking back now I see that there was a lot of carriage building going on at this time.
FR 'superbarn' 118, which I'd built up from resin castings, had been painted, assembled, had its transfers applied and, finally, varnished.
Himself was also starting work on a very long-term project indeed - the completion of a Worsley Works bowsider 19 which had been sitting in a drawer in its naked state for years.
I was also busy trying to keep up with the expanding WHR carriage fleet and had started work on saloon 2047 which was being scratch built in styrene - as opposed to the resin parts I use for the latest FR stock.
February
This was the big reveal of our finished Robex 3D printed Lilla.
I thought at the time - and still do - that it looks absolutely stunning!
We'd decided to finish it in its current, highly ornate, plum livery with oodles of gold leaf lining.
It was taking up all Himself's reserves of patience and concentration but it was already clear the results were going to be worth it.
He'd also restarted work to plug the last remining scenic gap on the layout, landscaping around the last two houses I'd built.
March
There was yet more carriage work going on with me kit-bashing a Dundas 'Bro Madog' carriage to make it look like it's current condition on the WHHR.
As to why I was doing it, that was about to be revealed...
I'd also been putting together the castings for the second of the latest FR observation carrs 152 ready for Himself to add a brass roof and the window pillars at the front.
The reason I was making a WHHR carriage became clear when I handed over Himself's birthday present - a Robex print for the Bagnall Gelert.
I had confidence that he'd make a fine job of the body, after what he'd done with Lilla
The challenge for him was going to be doing the outside frame adaptation on a Fleischman chassis to go under it.
I had a feeling he wasn't going to thank me for that...
Lilla will be one of the models getting a first run on Dduallt at an exhibition this weekend, having only been completed last year, long after the layout was last shown.
It's been used to give our slate waggon rake a test on the layout, here seen double heading with Moelwyn (one of my favourite models).
I'm told that Lilla is able to haul the full rake around the spiral unassisted, which is rather impressive for a very lightweight 3D printed body, I think.
The slate waggons are starting to show their age.
They're made from Dundas plastic kits and some of them are getting on for 30 years old, and inevitably that material starts to get brittle as it ages.
This is manifesting itself around the axle boxes which are the most vulnerable parts of the model.
Himself is taking about a rolling replacement programme for the fleet.
Never let it be said that we are unafraid to jump on a bandwagon at Bron Hebog.
As the FR celebrates the 125th birthday of Hunslet 'Ladies' Linda and Blanche by inviting lots of other Loiners to come and play in the top left and corner of Wales this weekend we thought we'd get in on the act too.
My social media feeds have been full of pictures of line ups of little locomotives so Himself decided to do the same by posing all our Hunslets together.
This collection was made possible by Brian Madge, Robex, Roger Chivers and Backwoods Miniatures - and we're very grateful to them for their wonderful kits.
So, after many hours of very delicate work, here she is - a lined out Lilla.
All she needs now is for the name and works plates to be fitted, which are currently on order from Narrow Planet.
As I'd hoped the lining really does help to draw the eye away from the inevitable imperfections of the 3D printed surface in places, although I have to say that the Robex body is one of the most impressive I have yet seen which is why we decided to take the plunge.
It is a shame that the motor and fly wheel is such a bloody great intrusion in the cab, but we shall do our best to disguise it with a portly locomotive crew.
To return to a theme in the post on the latest ready to run announcement a few days ago, we should be grateful to Minitrains for coming up with a simple, and very well running outside frame chassis which can be exploited by kit and CAD designers alike.
I can't wait to see her running on the layouts in due course.
I've got a rather nice picture for the first post of 2018.
Himself has been making steady progress with the second stage of the lining on Lilla, adding the thin red lines inside the pale blue which he put on first.
It's very delicate and painstaking work and what you see here is the result of a number of short sessions at the workbench because dealing with something as small as a quarry Hunslet in OO9 you quickly tire your brain and eyesight.
For the red lines he's switched onto the Kemco / Modelmaster waterslide transfers which are a little bit finer than the Fox product he used on the blue and the corner pieces have a smaller radius as well which works better for sitting inside the blue.
For the moment he's just got the 'clock side' of the loco done but it's clear that it's going to look stunning when it's finished.
Lining it out also has the benefit that, hopefully, it will distract the eye from the imperfect surface of the 3D printed body which still has many obvious horizontal bands despite his efforts to tidy it up.
I guess we've just been spoiled by having so many brass locomotive bodies in the fleet.
For the last post of 2017 I'll bring our modelling review of the year up to date.
October
Himself was steadily getting on with the top coats on the Superbarn 118 between other jobs.
He had many tasks on the go including fixing the last two bungalows in place and beginning the task of landscaping around them.
It was such a relief to have finally got all the houses built - a project which had taken many years to bring to fruition.
We also got round to purchasing a chassis to put our 3D printed Lilla body on.
At this stage it still needed some material cleared away from beneath the saddle tank which explains why it is sitting at a very racy angle.
November
There was still the need to paint the bungalows before they could be fixed in place on the layout.
The last of them was the most challenging of the lot because one wall has stone cladding which was very well represented by Himself.
The only shame was that this effect is mostly hidden from the viewing public at exhibitions because this is the side which faces the operators.
There was more work on Lilla.
The Minitrains chassis was improved with some new slidebars from RT Models and Himself also carefully filed down the fly cranks to remove the very large balance weights.
While he was doing all that I was busy earning a little money fulfilling a promise to build some of my resin SAR wagon kits for a customer.
December
As we moved into the final month of the year Himself set to with the task of painting Lilla which we're going to finish in its Penrhyn Quarry Railway lined black livery.
Currently he is engaged in the very careful and patient task of lining it out.
The project on my workbench at the moment is to bring our WHR carriage fleet up to date with the latest of the saloons 2047 which I am building from scratch in styrene.
So all that remains is for us to wish you all the best for 2018 and thank you for visiting the blog or keeping up with what we're up to by following us on Facebook or Twitter,
We'll be taking both Bron Hebog and Dduallt out on the rode during the year ahead and we look forward to seeing you there - full details are on the Exhibition Diary page.
Let's face it, there's not a lot of modelling gets done in the run up to Christmas, so I've got into the habit on the blog of taking stock of what we have achieved over the course of a year.
Quite often I end up surprising myself with how much has been done, because progress on a model can be such a haphazard affair that you sometimes don't realise how many things you have been working on over the period.
January
At the start of the year Himself was putting the finishing touches to our scratch built model of the new FR service car 125.
A few miles down the coast I was starting work on one of the more obvious missing pieces on Bron Hebog - the ruined barn which sits in the middle of the S bend.
And after many years sitting in primer Himself got around to painting the exquisite model of Britomartwhich was built up from a Brian Madge Quarry Hunslet kit (which are sadly filed under H for Hen's Teeth currently, more's the pity.)
February
There were other locomotive loose ends which Himself set about tidying up earlier this year, including the long-standing issue we had with the wheels on our Welsh Pony.
This model was built - with extreme difficulty! - from another now unavailable kit (do you spot a trend here?) and the problem was that one of the wheels on it was slightly less than round.
Our little pony ran with a nasty limp.
Fortunately, one of my contacts who knows the manufacturer was able to obtain a replacement set of wheels, for which we are most grateful.
Himself pulled the chassis part and replaced them, with the result that it now runs much more satisfactorily as you can see below.
Which is more than can be said about the real Welsh Pony! (Patience is a virtue...)
As milder weather arrived he ventured into the garage and began scenic work on the layout again, making a start on the scale miles of post and wire fencing alongside the line.
I was very taken with an overhead shot he took of the farmyard area, which I think showed off the subtlety of the scenic work he's been doing.
March
While that was going on Himself had been painting the old barn which was ready to be tried out in position on the layout, and looked very effective.
We'd also taken a radical step into a new technology: 3D printing.
For his birthday I bought him a copy of the Robex design for the unique Quarry Hunslet Lilla which I had been admiring for some time after seeing pictures of models which other people had made.
Until now all our locomotives have had brass or white metal bodies.
Himself found that bits fell off this one from virtually the first time he held it, which didn't do much to endear him to the medium.
On my workbench I had begun another stretch of house building with the intention of finally finishing the Oberon Woods estate scene.
So it turns out our Lilla is indeed going to be finished in black.
I popped over to Himself's place at the weekend to discover that he'd grown impatient waiting for a response from me (it appears he was expecting this almost instantly) and has given it a first coat of gloss and matt black.
He's grumbling a little about the time it is taking to dry and wondering whether this is something to do with the 3D material, but this seems a little odd to me given than it was primed first.
He's also decided that we're going to do it in fully lined Penrhyn livery, which is just as well seeing how he's the one who's going to have to do it.
In my role as arbiter-in-chief of colours I helped him sort through his vast collection of part-used packs of Fox Transfers sheets to find out what he needed to order and left him to it.
With apologies to Sir Mick and Keith, but it appears I have a decision to make with regards to our Lilla.
Himself has been adding a few brass embellishments to the 3D printed Robex body, such as the handrails and whatever it is on top of the dome.
(UPDATE: since this was posted a reader has got in touch to tell me it is a regulator lubrication valve. Every day's a school day.)
I get the impression he finds working with this inherently brittle material rather stressful compared to brass or white metal.
(His last email to me began with the words 'before I wreck it completely....')
Those of you who are familiar with the Minitrains chassis which is used on this kit will notice what a good job he's done reshaping the fly cranks so they no longer have the big counter weight on them.
He has also made use of a handy etched fret from RT Models to replace the slidebars and the original, and rather chunky, couplings have been changed as well for brass ones.
So now he's asking me about my preferences for painting it?
It seems to me we have three choices,
For a while on the FR it ran it plain black livery.
(I'm sure he'd be delighted if we plumped for that.)
Then for a long while it was in lined out Penrhyn Quarry Railway livery, and last winter it emerged from Boston Lodge in the rather natty Cilgwyn green.
Himself has been working on fitting the new cylinders, slidebars and crossheads to the Minitrains chassis on our Robex Lilla.
He told me there were a few adaptations required, but then we never had time for him to actually explain to me what they were, so you'll just have to look at the pretty pictures instead.
I've yet to see it run but from what Himself tells me it is sensationally back-heavy which is obvious from the position of the motor which is positioned vertically in the cab area,
Fortunately for us there is a lot of space inside the saddle tank, and even the smokebox which can be stuffed with weight, which as well as stopping it doing wheelies every time it moves should also do wonders for its tractive effort.
The Robex 3D body is resting on top of the Minitrains F&C outside frame chassis, but there is still a section of print to be removed from inside the body before it sits in position properly, which explains why it's sitting so high at the back.
When I saw it my first impression was that it looked like a Red Bull F1 car which are set up with a very aggressive rake.
I've set Himself the challenge of doing something to trim the fly cranks.
The Minitrains chassis comes with the large balance weights which you can see in the picture above, but Lilla is fitted with basic cranks.
Hopefully some judicious use of a cutting disc on the end of the mini drill should sort that out.
Himself has put his repairs to the cab front of our 3D print of Lilla to the test by giving the body a coat of primer.
The join is not quite invisible but it doesn't stand out especially, the only difference to the rest of the model is that the lines are vertical rather that horizontal.
Now the body has a coat of paint, rather than the translucent finish of the print, you get more of an idea of the quality of it.
In places, particularly the rear cab sheet, I am surprised just how visible some of the lines are, even having opted for the best quality print.
Despite that I remain impressed with the way the body has been designed, and it is clearly a very impressive technology.
For the moment, however, it is clear that it cannot compare to the quality of finish that can be achieved with etched brass or injection moulding.
The one consolation is that the pictures of the recent repaint of the real Lilla at Boston Lodge show just how rough and pitted the surface of the platework is, so perhaps by the time our engine has been top-coated, and lining distracts the eye, the imperfections of the 3D print might not be quite so obvious.
Broadcaster, writer and railway modeller.
Best known for the 009 Festiniog Railway layout 'Dduallt' which I built with my father David in the early 1990's and which is still making appearances on the exhibition circuit.


.jpg)

