Wednesday 29 June 2011

Scratchbuilt Carriage Kit

After many hours making the sub-assemblies the carriage body comes together quite quickly.

These pictures take you through today's session on Service Carr 2011.

The last 'parts' to be completed were the two end pieces which required the second layer of detailing strip to be put on and the corridor connections fixed into place. One of the more fiddly jobs is the electrical connector and cable. The vacuum hose will be one of the last pieces to go on before the carriage is painted because they can be easily knocked off.

Here, then, are the sides and ends laid out...


The inset door assembly has been fixed to back of the main carriage bodyside and bonded to one of the ends..


My floors and roofs sit within the bodyside to stop it bending inwards at the middle. The floor is the bottom of the two pieces here, with the cutaways for the vestibule clearly seen, and the false, flat bottom of the roof above...


Here is the 'box' put together with the false roof in place, it's finally looking like a carriage now...


And with the roof skin in place..


Tuesday 28 June 2011

4 Door Saloon

That's all four doors completed for the WHR Service Carr 2011, and the next stage is to mount them behind the central section of the saloon, detail-up the ends, and fix it all together into a box shape.

I mentioned before that these door sub-assemblies are very complex models in their own right.

I had a quick count up and each one is made up of 28 separate pieces of styrene which have to be cut to size and glued in position. No wonder it takes about an hour to assemble each one.

In this pic you can see two of them turned over showing how the window droplight detail and the inset steps beneath the door are formed.


Oh, and in case you were desperate to know the exact shade of paint used on the Romanian ballast wagon (see the previous post) Himself has now reminded me it is Railmatch EWS maroon.

Monday 27 June 2011

Wagon Update

I pondered long and hard about a suitably awful pun to title this post but I think I have been defeated this time. Apologies for that.

Anyhow, here's a picture which is pretty self-explanatory.


As you can see Himself has given the Romanian ballast wagon a blast of top coat red.

On this model it was a close call as to whether it was a red wagon with lots of black bits, or a black wagon with red bits. Self-evidently we have decided on the former and the black will now be picked out by hand.

With red not being one of his better colours he asked me to select the shade of paint. I'd like to tell you what it was, but I can't; I've forgotten.

Apologies, once again...

Sunday 26 June 2011

The Doors

Tonight I'd thought I'd show you what's involved in making up the doors / vestibules for the WHR carriages.

These are made up as a sub-assembly to be fixed to the back of the main part of the carriage side.

In this view you can see one which is still at the first stage and another which has got 2/3rds of the second layer of detail added.


In effect it is like making a mini-bodyside.

When adding the second layer I start with the vertical L shape piece which acts as the spacer for the inset vestibule.

On either side of the door are thick pillars and then the door itself is represented with some very fine strips above and below the window.

As the WHR carriages get a mid-life overhaul at Boston Lodge they are adding wood framed window droplights, and these are made up on the model with a third layer of detail at the back.

These door assemblies are also handed. The ones you see here are for the left hand side.

Friday 24 June 2011

Lumps & Bumps

Down south there has been some progress with the Blanche II project.

Having tried out Archers resin transfer rivets on some 7mm ballast wagons I made for a Boston Largs Works client I suggested them to Himself as a solution to the problem of the miss-matched rivets on the Backwoods Blanche cab and the Dundas tender cab.

The results are very pleasing...


As you can see, Blanche has had her first encounter with the airbrush, and is now sporting a base coat of green.

The big brass bump on the saddle tank is the first draft for her new dome which was offered up for size before the final version goes into production.

Wednesday 22 June 2011

MOTW - The Square

Our model this week is one of Himself's masterpieces, the 1970's 'Super Fairlie' Earl of Merioneth.


The basis of this model is a Backwoods Miniatures Double Fairlie kit for the classic late-Victorian Fairlie, which provides the double bogie chassis and the main frame for the superstructure.

But the most visible part of the locomotive - the iconic angular square body - is Himself's work; scratchbuilt in brass.

The D shape smokeboxes are whitemetal castings from the kit for Linda / Blanche kindly provided by Parkside Dundas.

Being born in the 70's myself I have a very soft for the Earl, or 'The Square' as it is more commonly known around the railway.

It was built at a time when the railway's sole focus was on carrying as many passengers as possible, in as fewer trains as possible, to Blaenau and so the massive tanks - which put the locomotive over the weight limit when full - were designed to hold enough water for a round trip and sufficient fuel oil for the whole day.

The loco's makeovers in the late 80's, and again in the 90's, were remarkable for the way they transformed the look of the machine with very few changes to the superstructure and should perhaps be required reading for design students.


Aside from the bling brass domes - not shown in the picture above, which formerly adorned Merddin Emrys during its own aesthetic nightmare in the 70's / 80's - and the new round smokeboxes, the changes were purely cosmetic and achieved with a paintbrush.

To this day I struggle to believe those are still the same tanks and cab the locomotive first appeared with in 1979, but they are. It is an optical illusion caused by the lining and moving the position of the nameplates to the centre of the tanks.

Tuesday 21 June 2011

Service Entrance

I've got a few more bits to show you on the WHR Service Carr project.

Because the 'standard' WHR carriage design has recessed vestibules my scratchbuilt carriages are much more of a composite affair than a normal box of two sides and two ends.

After constructing the two main sides of the passenger saloon I make four doors which will be fixed on to the rear - with a 60 thou strip acting as a spacer - at each end.

It's a little hard to describe so I shall post pictures here on the blog at each stage.

Below you can see the basic outline of the four doors. The pillars are a little wider on one side, this is the overlap where it is glued to the back of the main bodyside.


Also in the picture are the first stages of the carriage ends. On these you can see quite clearly how the carriage body is narrower at each end. The very top - the curved profile - is the full width of the carriage.

Below are the two sides which are just about finished now. It's a shame I can't have 3D pictures on the blog so you'll have to take my word for it that the louvre doors look a lot more convincing on the actual model than they do in these snaps.

Monday 20 June 2011

Blanche's Bling

So here we are then, a first glimpse of the new dome for Blanche II..


What a beauty!

Once again the difference in size from the original cast dome is striking. It has come out at roughly the same dimensions as the whitemetal version on Blanche I (a Parkside Dundas kit).

Our sincere thanks to fellow NG modeller and kit manufacturer Chris Veitch for producing this dome so swiftly.

No doubt Himself will be providing some pictures of it in place on the 'Back-Side' kit when the Royal Mail has done its worst.

Sunday 19 June 2011

Publish And Be Domed!

Our Blanche II project has hit a snag - a big, shiny, brassy snag.

Having posted pictures of the cross-breed 'Back-Side' Blanche on the blog a number of readers got in touch to tell us they thought the dome was too small.


We have to confess we'd never noticed, but when we looked at it again it was quite clear they were right!

Placing Blanche II's cast brass dome next to the painted whitemetal dome on Blanche I shows that it is smaller by quite a margin.


Having neither a lathe nor any experience of turning domes we were a little stuck about what to do?

The obvious course was to use another Dundas whitemetal dome on Blanche II, but a brass paint effect, as we used 20 years ago on Blanche I, is not very satisfactory.

Fortunately some fellow modellers have kindly come to our rescue with offers to turn up some brass domes for both Blanche and Linda.

I shall keep you posted with progress.

Saturday 18 June 2011

Whole Lotta Louvre

With apologies to Led Zepplin here's a update on progress with the 2nd WHR service carr.

I've been working on the second bodyside - the ugly one - with the generator compartment and its louvre doors...

Here's the real thing...


And here's the model...


Each of the slats of the louvre doors has been cut from strip, shaped and chamfered, and glued in place. There's 17 of them on each side. That's a lot of louvres.

As I've said before, I don't do rivet counting, and in this case I don't do louvre logging, so there may be a few less of them than on the real thing but what matters to me is whether I've captured the look and the feel of the real thing.

Do let me know what you think

Friday 17 June 2011

Two I Made Earlier

Following on from last night's post on the finishing touches to carriages 123 and 106 here are a couple of snaps of the paint job on the matching pair, (for export to England).


You can see in this second shot how the bodysides bend in towards each other without the floor / chassis in place to keep them straight. This is perfectly normal. It's when they want to flex outwards that you've got problems!


These just need a bit of touching up here and there and then they can be put back together, the glazing inserted and sent off to their new home.

You can find out more about my scratch-building service on the Boston Largs Works blog.

Thursday 16 June 2011

Bagged Up

I've just about finished the build of my latest pair of 'Barns' - the FR's new / old observation carr. 123 and the latest incarnation of 106.

The last remaining task - apart from fixing on the roofs - was making up some vacuum pipes and bonding them in place.


We make our hoses - or 'bags' as they are known on the railway - from wire stripped from old Peco point motor coils, wrapped around 0.7mm brass rod.

You might notice that the vac pipes run along opposite sides of the carriages - another of those FR carriage details that you have to watch carefully for.


I've another pair just like this being painted (by me) at the moment (for a client) but these two below will soon be sent south for Himself to finish off.

Wednesday 15 June 2011

Busy Beading

A brief posting for you with an update on progress with the WHR service carr 2011.

Most of the second layer beading detail has been applied to one of the bodysides now...


In case any of you are wondering where the doors are, I suppose I should mention that the WHR carriage designs have inset vestibules and these are made as sub-assemblies which are then attached at each end of the bodyside piece you see here.

That's why there's a piece of overhanging strip at each end at the top.

So when I glue together a WHR carriage there are 8 component parts compared to the more simple 2 sides and 2 ends of a conventional FR carriage.

Tuesday 14 June 2011

MOTW - The Rhosydd Waggon

For the latest Model Of The Week feature we're going back to the origins and the purpose of the FR: The slate waggon. (Please note the two g's - the traditional spelling on the railway)

This, though, is not your average slate waggon. It's a semi-scratchbuilt model of the unique replica of a wooden bodied waggon from the Rhosydd Quarry.


I say semi-scratchbuilt because I used a Parkside Dundas 2 ton waggon chassis kit as the basis for the running gear on the model. It's not completely authentic - the wheels and the axle boxes are different on the actual waggon - but the thing's so small that only real waggon geeks are going to notice the differences. (And you know who you are!)

While I'm in the confessional - which is highly appropriate considering the restoration project was led by a priest - I'd better admit I didn't bother with 'bobbins' either. (That's the name for little iron collars that separate the wooden rails)

The challenge on this model was to accurately drill holes in the rails - which are strips of styrene - so that each rail slipped easily onto the brass wire uprights.

If any one of the holes was even slightly out of position the styrene strip would flex upwards or downwards rather than sitting straight and true.

There is a second similar waggon in our fleet, a version of one of the FR's own fleet of wooden bodied waggons, which was built in the same way but with a slightly different layout of the side and end rails.

Some notes on the prototype and its origins.

Rhosydd Quarry was situated at 1800ft. above sea-level on the col north-east of Moelwyn Mawr, near, but never connected to, the Cwmorthin Quarry that fed to the FR at Tanygrisiau. It makes a great hill walk to follow the track up into the hills behind the village to see the remains of both Cwmorthin and Rhosydd Quarries where slate-built barracks and a lonely chapel are slowly submitted to the elements.

The remains of this waggon were rescued from beside the main incline by a group of FR volunteers.

Restoration was restarted in 1999 from nothing more than most of the ironwork and newly-made longitudinal chassis timbers.

The team had only one drawing to work from as there are no known photographs of this type of waggon.

It has had a number of runs down the FR in the years since as part of the FR's restored gravity slate train.

Incidentally, there is currently an appeal by the Festiniog Railway Heritage Group to restore yet more of these wonderful slate waggons and provide undercover accommodation for them so the unique spectacle of the gravity train can still be enjoyed by generations to come, and we commend it to you.

Monday 13 June 2011

Let's Get This Straight

I've written before on this blog about the perils of modelling a real location in a contemporary time frame. In short, they keep changing things before you've finished the layout!

There's been another example of this at Beddgelert in the last week or so.

A working party has removed the rails at the end of the siding behind the old water tower base where it curves sharply - too sharply for anything other than an 0-4-0 locomotive to traverse - and runs over the old servicing pit.

The new plan is to realign the siding so that the replica water tank, when installed, can be used. As a result the pit there will be covered over to be preserved as a 'heritage item'. It has been judged that the dimensions mean it would be of little use and is, therefore, not really necessary. The area has now been fenced off.

This means our Bron Hebog layout is now something of a heritage item itself...


To try and follow suit would be quite an upheaval, and a waste of time too, because we'd always be chasing our tail.

What about when the water tank finally gets lifted into place? Himself and The Artist went to great efforts to make it look suitably manky. And the station building - proposed as part of the Phase 5 appeal - what about that?

And then there's the derelict barn in the middle of the S curve which is being renovated right now. I could go on, but I won't. I suspect you've got the idea by now.

No, most sensible thing is to lock our layout into 2009 - 2010 condition. And anyway, it will give all those smart-arses who turn up at exhibitions something to point to and smugly inform us 'you've got that bit wrong!'

Aren't the public wonderful?

Sunday 12 June 2011

Lady In Red

Well, almost. It's a Penrhyn 'Lady' and she's wearing red oxide primer.


Himself and I have agreed on the final livery for Blanche II, our mongrel 'Backside' kit.

She's going to sport her current FR green livery.

But hasn't Blanche been green for virtually her whole career on the FR, I hear you ask?

Indeed, but there's green and green, or to be more precise, there's not always been the same amount of green on her.

As regular readers probably know, when we built our layout Dduallt and the rolling stock for it, 20 years ago, we set it in the year 1988 which was the last year the passing loop could be used.

At that time, like most of the other FR locos (with the notable exception of her sister Linda) Blanche was running with a black cab frontsheet.

When her 100th birthday was celebrated in 1993 she emerged from overhaul with a lined green cab front and has remained so since.

It was in this version of FR green livery that she worked for two spells in the early days of the WHR between Caernarfon and Dinas and again double-heading over the whole line this winter.

So it's a much more appropriate finish for Blanche II to appear on Bron Hebog with.

Saturday 11 June 2011

Service Status

Here's the first day's progress on the new WHR Service Carr 2011.

As you can see I'm employing my usual carriage building technique, described in more detail here using my own sketch detailing the window pillar positions as a guide..


The service carrs are easily told apart from the passenger saloons by the letterbox style windows which are positioned about a foot above the waistline of the carriage.

However I started off with a bodyside panel the same height as the passenger carriages (about 12mm) and then dropped some sections between the pillars to close the apertures to the right size.


It's quite time consuming but doing it this way I can use the joint line as a foolproof guide for getting the waist line bead (which is in the same position as on the saloons) level and in the right position.

As I explained in the last post, one of the bodysides is straightforward with a regular window pattern. That was the first one I tackled..


And followed it up with the 'clock side' which has the generator compartment doors, which have been filled in with some styrene panels and will eventually have strips glued on top to represent the not-very-narrow-gauge louvred doors.


I understand these were fitted to help cool the generators which have been prone to overheating in the service carrs already in traffic on the FR and the WHR but for me they succeed only it making it look like a dodgy '70's wardrobe on rails.

Friday 10 June 2011

Let's Make A Plan

In the week when the WHR's second 'service carriage' was put into traffic I have started work on a 009 version.

Passengers will no doubt appreciate its lavatory during the 2 hour journey and the bacon butties served up from the kitchen area will be welcome too, but I'm afraid I can't helping thinking it's the ugliest carriage on the railway....


A complication with this project is that, for once, I don't have the benefit of any design drawings to work from. I asked my usual sources if they could let me have a copy and they replied, "Drawing? What Drawings?"

You see, this service carriage has been a bit of a make it up as you go along job.

It started life as the WHR's original semi-open carriage, the same as this one...


Fortunately the Boston Lodge team decided to leave much of the original steel framing unaltered during the conversion, so the existing uprights determined the position of the new windows, and as I do have a plan for the semi-open design it means there are enough known knowns for me to knock up a 'guesstimated' drawing to build the model from.


The 'engine side' was very straightforward with each 'old' window divided with another pillar approximately two thirds of the way along.

The 'clock side' is a little trickier, because they had to cut into the frame to form a compartment for the generator and the window spacings are not identical all along the bodyside. That's why on my sketch - which is all I really need to get the pillars positioned right - there are some marked in blue which denote the position of the pillars on this side of the carriage.

So I shall head off now and try it out, and I'll post some pictures here soon so we can all see whether it looks anything like the real thing...

Thursday 9 June 2011

Tanks A Lot

With the latest contract carriages ready to paint I've returned to my own model of 123 to attack the snagging list. The main things missing were the various tanks attached to the underframe - vacuum reservoir tanks, fuel tanks etc - some of which were added during the recent overhaul.

Thanks to some close up ground-level shots supplied by Roger Dimmick I've been able to knock these up easily and a great deal more accurately than I would otherwise.


I've only bothered to include the big, obvious bits under there. I won't be bothering to represent the brake cylinder or the brake gear because, quite frankly, no one will ever notice it missing on the layout, and you almost never see it on the real carriages either because they sit so low to the ground.


One thing that does stick out like a sore thumb is the diesel tank filler pipe, a feature on quite a few of the FR & WHR carriages now as the railway has moved over to Eberspacher heaters.


Just some vac pipes to make up now and it can be sent off to join the queue for the paintshop down south.

Tuesday 7 June 2011

MOTW - The Mess Coach

And so to our second Model Of The Week. It's not a locomotive but one of the most humble, and yet distinctive, items of rolling stock on the FR; the P-Way department's Mess Coach 1111.


Both the real carriage and the model are revolutionary. In the case of the actual carriage it is because it was the first time in nearly 40 years the track gangs had been given a dedicated and bespoke mess vehicle. Previously they'd had to rely on pokey four-wheel brake vans.

It was built by Winson Engineering at the mid-1990's and is said to have been intended as a prototype for the WHR carriages. Much careful thought went into its design and how it was to be used.

The verandahs and the doors at each end of the carriage ensured workers could safely and easily access the vehicle in even the tightest spots where the trains squeeze between stone walls and in cuttings, and the platforms were sheltered by the extended roof.

The carriage is narrower than the other bogie vehicles on the railway and a rope is hung along each side as an additional safety system when working in those places where the trains perch on precipitous ledges.

Inside there are tables and chairs, a toilet, a stove and a drying cupboard.

I suspect many gangers on preserved standard gauge lines would look on enviously at this bespoke, 5 star accommodation.


Our model of this carriage - the only one that I know of - was a technological breakthrough for us too.

It was the first time we built a carriage with the roof fixed on and a removable floor / chassis. Previously we had glued the floor into place in the early stages and the roof was only fixed down after painting and the installation of glazing.

1111 required a different technique because of the roof overhanging the balconies and it proved to make the carriage bodies sturdier and much more robust and it has now become our standard way of scratchbuilding them.

It is a very distinctive carriage, and I have to say, one of my favourites.

Monday 6 June 2011

Love Me Tender

Fired with enthusiasm (oil-fired in this case, of course) Himself has set about work on 'Blanche II' with gusto.

We happened to have a spare Parkside Dundas tender - as you do - so that's been knocked up, apparently using some bits from the Backwoods kit too (Himself hasn't said which bits) but still using the whitemetal roof because the brass version was too thin and the rooflines didn't match.


All it needs now is a double line of rivets where the cab bit joins the main part of the tender and the job's a good 'un.


With a Backwoods front half and a Dundas rear - which sounds a bit like a 009 pantomime horse - I suppose it could become known as a Backside kit!


There's been progress on the business end, too.

Himself also happened to have a spare pair of coupling rods - acquired from the ever-helpful Mr McParlin - and these have vastly improved the running of the locomotive.

It's moving smoothly and the compensation on the front axle is working again as it should. Himself believes he had made the holes in the old rods too big and they therefore had too much free play.

Taking all these 'learning points', as educationalists would say - or realising how he buggered up the first one, as Himself would say - he's also recommenced assembly of the Backwoods 'Linda'.

This is a development which begs a very big question - what colour to paint it?

Green like our existing one, or maybe Midnight Blue, or perhaps lined Penhryn Black?

Choices, choices.....

Saturday 4 June 2011

Bye Bye Blanche....

It is my solemn duty to report that one of our longest serving locomotives has had to be retired.

As you may have read on the blog, last weekend Blanche suffered a catastrophic failure while operating on Dduallt at Railex which has proved to be terminal.

She shed the front crank on her 'clock side' and spent the rest of the exhibition as a cripple in the headshunt at the bottom end of Dduallt station - a location the real locomotive is rather familiar with....


She was taken into the works by Himself this week to assess the damage.

This Blanche is a Parkside Dundas whitemetal kit running on an Ibertren chassis with our own outside frame conversion, which involved fitting new axles and homemade cranks. The model is now best part of 20 years old and has most probably run hundreds of real miles in more than a hundred exhibition outings.

Although Himself was able to solder the crank back into position he discovered the reason for the original failure was that the gears (which drive both axles) are so worn they are prone to locking up and jumping teeth, putting out the quartering. The model runs forwards smoothly, but not in reverse.

So what to do?

Plan A was to see if it would be possible to change the gearwheels using donors from a spare Ibretren chassis, but that doesn't seem to be a goer. We could, of course, replace the whole chassis, although that would involve transplanting the whitemetal cylinder assembly and repeating the outside frame conversion.

It more or less means making another model.

So it's on to Plan B - and 'B' stands for Backwoods.

Five years ago Himself constructed a Backwoods Miniatures kit for Blanche but never managed to get it to run properly and it has remained 95% completed in the desk drawer ever since. The problem was with the motion locking up, possibly because of the compensating front axle which the kit is designed with.

Having since built a few Backwoods Garratts, the Darjeeling tank, Russell and Lyd, Himself feels ready to have another bash at Blanche.

(There's also a Linda kit lurking in the same drawer of doom!)

Performance was not the only issue with this kit, however.

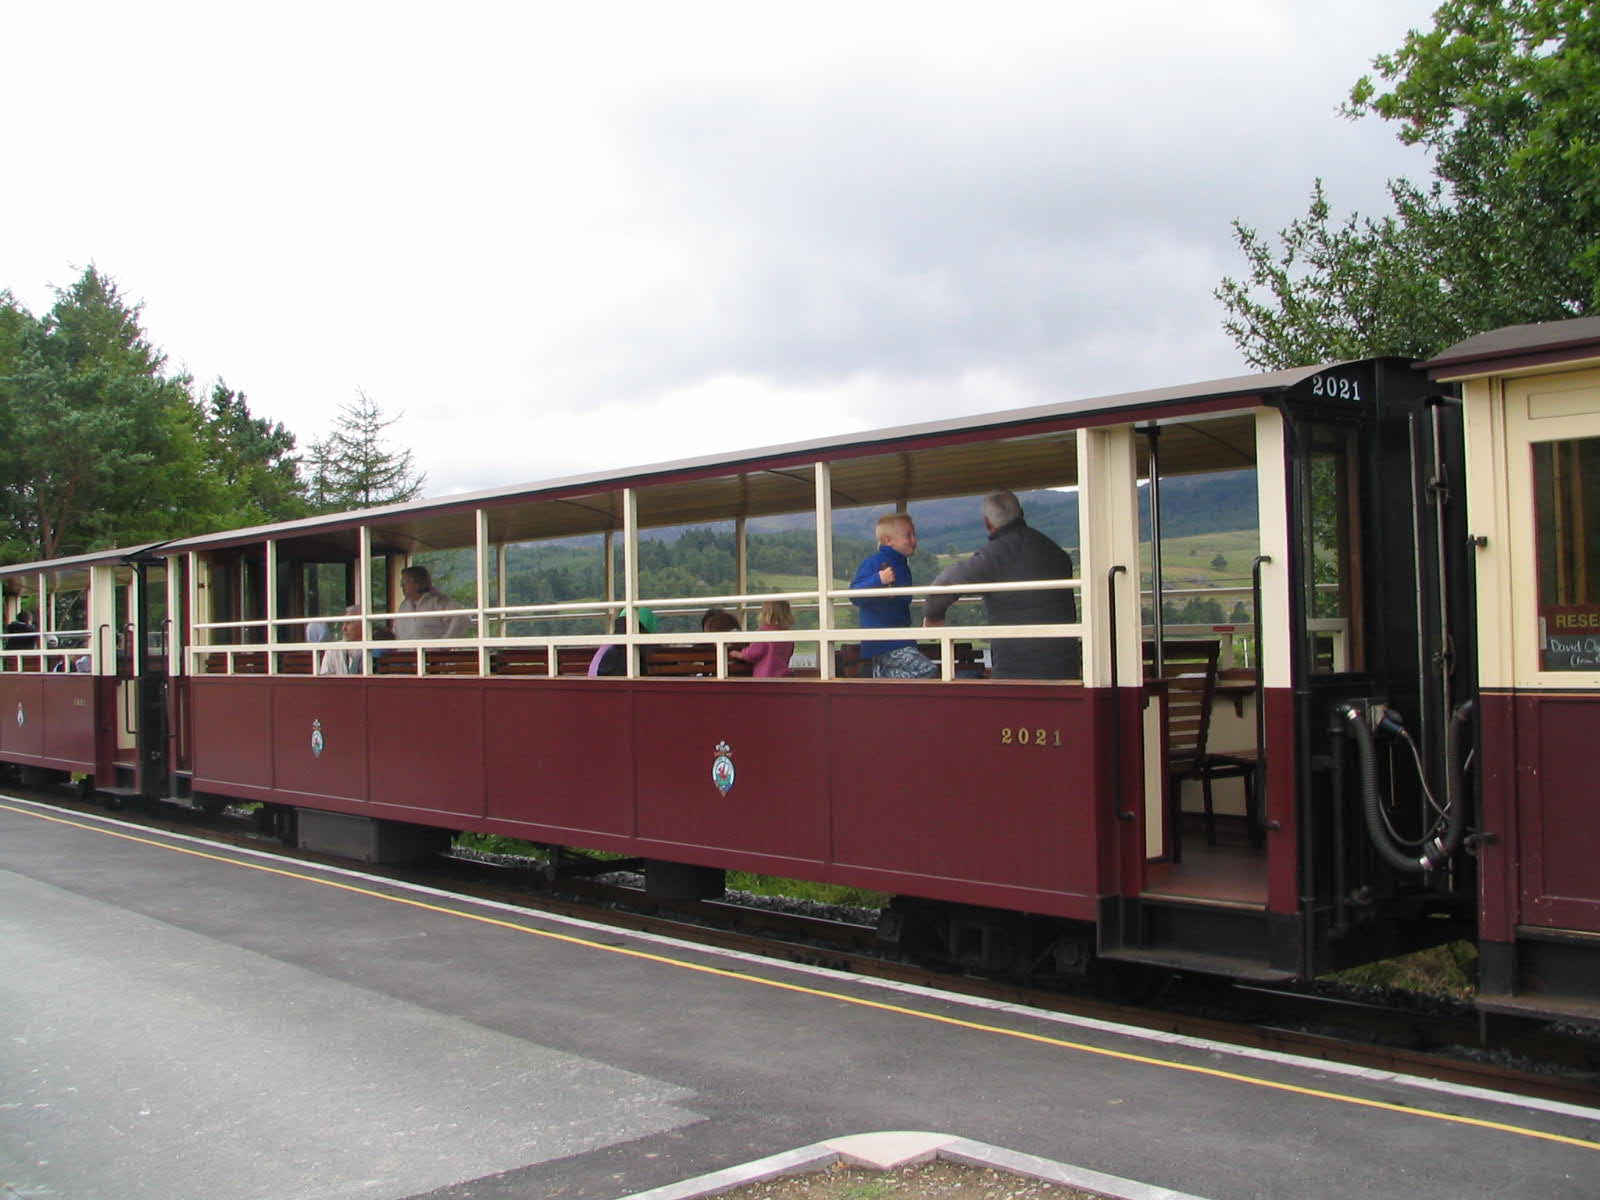
In a rare blunder, which he freely admits, Pete McParlin designed Blanche's tender cab assuming it was the same length as Linda's. Wrong! Linda's tender was adapted from one of the old England locomotives, while Blanche's was a new build, and as a result, the tender supplied with the kit is too short.

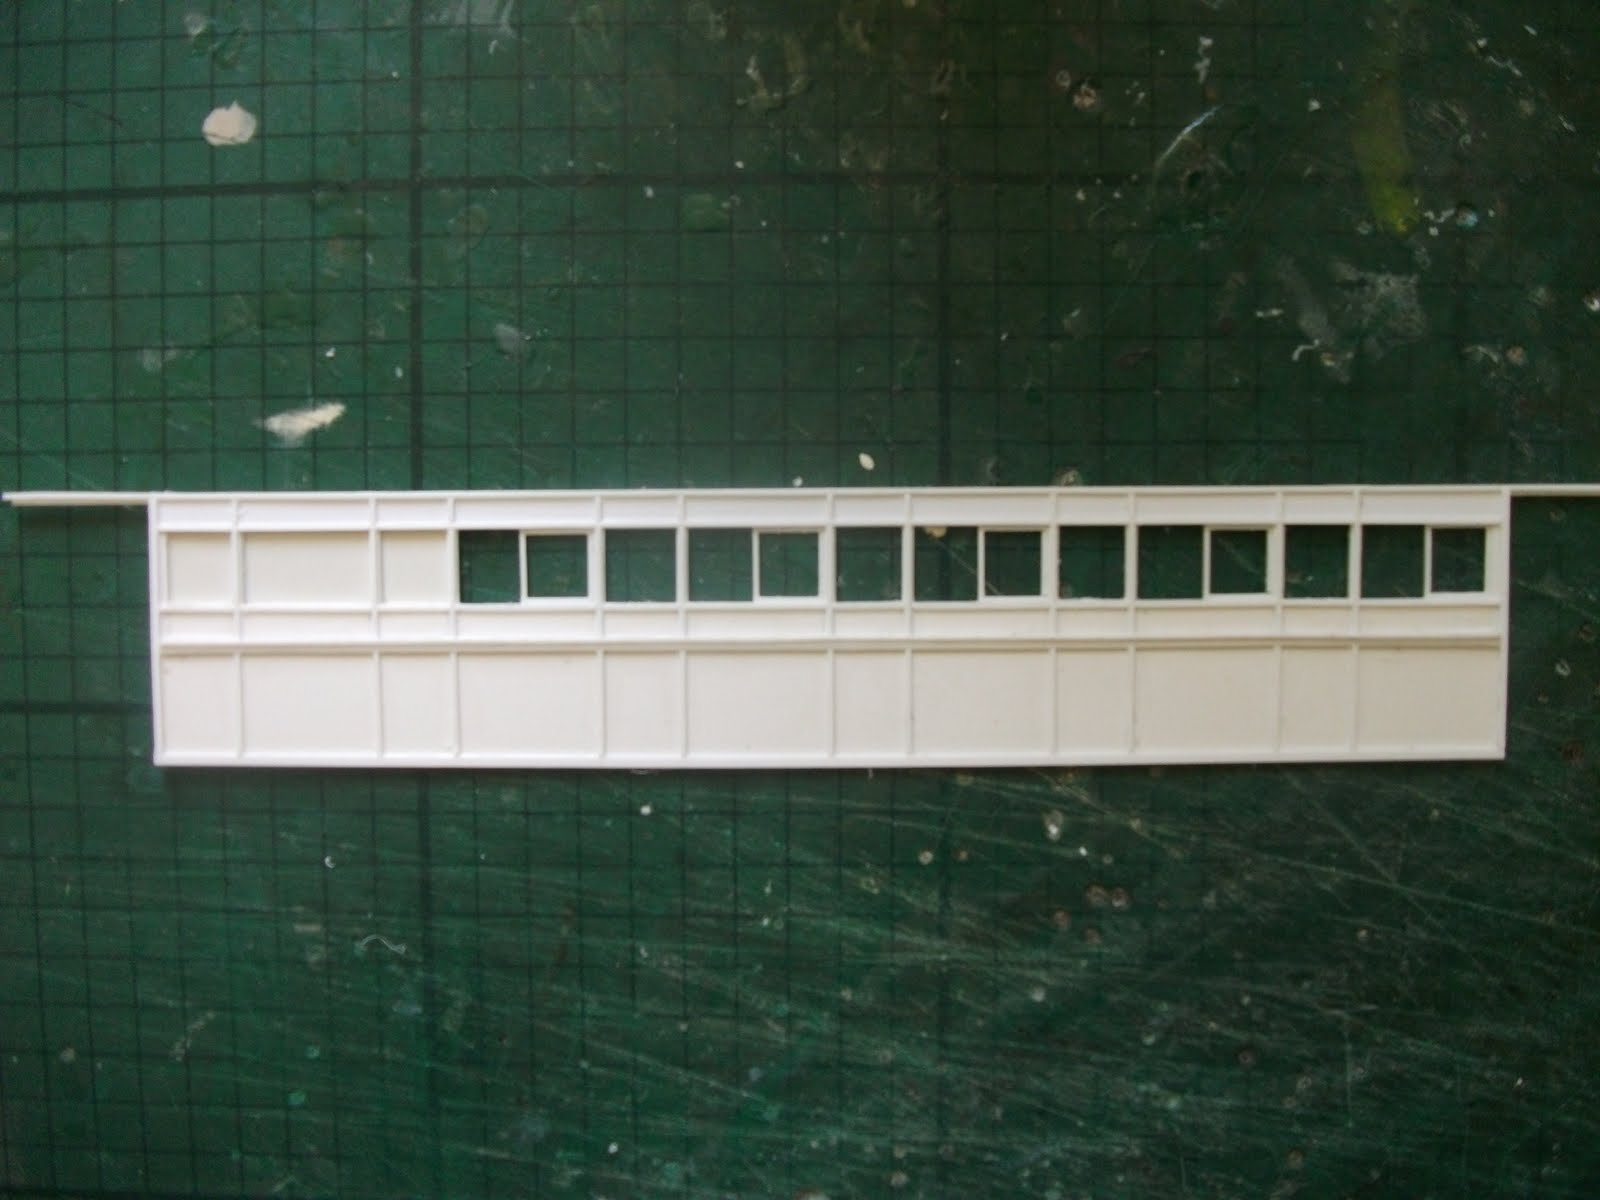
The whitemetal tender which comes with the Parkside Dundas kit, however, is correct. Compare the two images below...


The Backwoods / Dundas combination is a pretty good mix aside from the whitemetal rivets on the tender which look rather obese compared to those on the locomotive.

After considering various options, including attempting to splice an extension into the brass tender, Himself has decided the best course of action is probably to file the rivets off the Dundas tender and replace them with resin transfer rivets and substitute the whitemetal roof for a brass one.

As for our old Blanche, she's heading for retirement as a static exhibit. Here's how all the Bron Hebog team will remember her, captured while hauling one of her last trains around the spiral.


R.I.P. Ricket!