Thursday, 27 December 2012

Santa Loves Narrow Gauge

He must do, because this is what I found under the tree on Xmas Day - a new cutting mat and a copy of Gordon Rushton's epic work recounting the story of the restoration of the WHR.


My old cutting mat was well overdue for replacement. Various accidents with solvent had left it not exactly flat anymore, which made cutting long straight lines rather difficult - unless extreme pressure was placed upon the piece you were cutting the line would often come out slightly curved. So a new one is very welcome.

The book is being slowly thumbed through. It is sumptuous in terms of text and illustrations. Indeed one might say it should be for the rather high price (£68) that the publisher has set.

But Gordon has a unique insight into the birth of the restoration project and has followed it very closely since and this thick volume is positively encyclopedic in the detail given of the historic, political and engineering aspects.

From my point of view, given the current projects I am working on, it is a shame there is no chapter devoted to the freight stock imported from South Africa, but there are plenty of pictures to peer into the corners of to discover hitherto unknown details.

I have to say that I have come across quite a few instances of typos and missing or duplicated words in my quick perusal of a few chapters, but if you read this blog regularly you'll find plenty of those here so people in glass houses etc..... (Although, of course, I'm not charging you £68 to read this...)

But let none of that distract from the fact it is a marvellous book and in my opinion anyone with an interest in the rebuilt WHR should be looking to buy one, even if they will have to save their pocket money first.

Tuesday, 25 December 2012

Merry Christmas / Nadolig Llawen


Sunday, 23 December 2012

Ramping It Up

I was right all along - and now I have proof!

When I began work on the B wagon kit a few weeks ago it was my intention to produce a kit which could be customised to portray these wagons fulfilling the various roles they have had on the WHR / FR as general freight carriers, coal transporters / storers and as bike wagons.

I was pretty sure in my own mind that one of these 'new style' wagons was once employed as a bike carrier but I couldn't find any proof of that through sources such as the official stock book or the Festipedia wiki.

Fortunately Himself has come up with the goods and provided me with the photographic evidence I wanted:


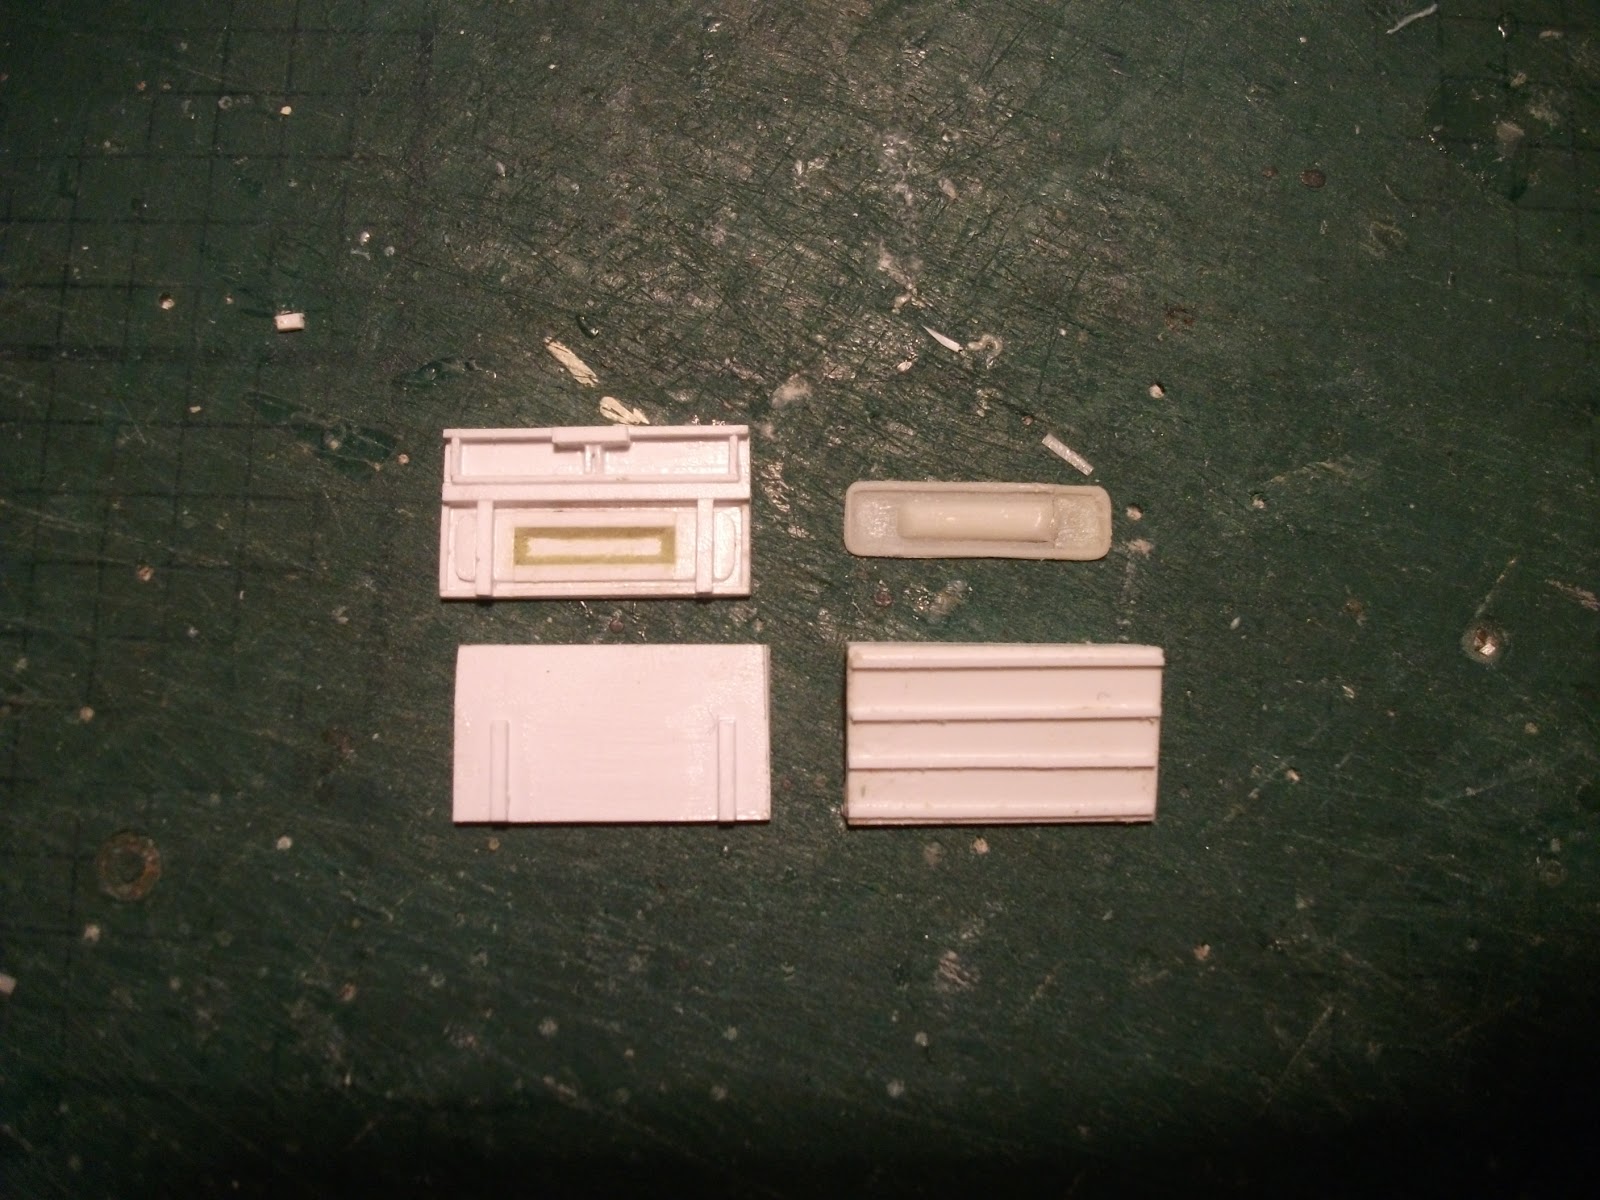
This was all I needed to press ahead with designing some alternative doors and ramps which means that, should they wish, customers will be able to buy a kit with the bits to build their own models of the WHR bike wagons.

In this shot here you can compare the masters for the two styles of door.


I'm intending to build one of these as a second bike wagon for Bron Hebog, to run along with our old style version,  so even if there are no orders forthcoming for an alternative kit I won't have wasted my time and effort.

Friday, 21 December 2012

Spot On

This time the rivets are going on for real.

I've applied rows of resin transfers onto the masters for the NGY ballast wagon.

Fortunately there are not too many of them and they're in a relatively simple pattern along the bottom of the frame.


You can see that I've also had a play about with one of my spare DZ castings to see if it's realistic proposition to add them onto these wagons.

By contrast to the ballast wagon there are quite a lot of them in awkward places.

Fortunately I can report that they went on very easily (they really are very good, these rivet transfers) and so I shall press ahead with putting them onto my own fleet of DZ's for Bron Hebog

I think I will probably also stick some onto the masters for the DZ kit before I come to cast the third batch.

Wednesday, 19 December 2012

MOTW - 117

This carriage is now one of the older ones in our fleet, a fact given away by the rather huffed-up appearance of the windows.


It was probably one of the last carriages I built where the floor was fixed and the roof was left removable up until the point when the model had been painted, then the glazing was slipped in and the roof glued in place before the carriage received a final spray of varnish.

It is the varnish which frosted the windows which was the inescapable downside of building the carriages this way. Because we now build them with a floor which can be pulled out, and back in again, at will the glazing does not have to be inserted until after the model is varnished meaning the windows can remain impeccably transparent.

Our model shows 117 running in the push-pull set in the mid-1990s. 

It had recently had a comprehensive rebuild that saw all the pillars rearranged and reduced in number so the narrow, vertical drop down windows it was built with in 1977 were replaced with the bigger, bus-style, design with the sliding openings at the top.

This made the carriage look very much like 121, which was the last of the six 'tin carrs' built at Boston Lodge in the late 70s and early 80s, but inevitably the two were never identical.

In the fullness of time I will have to get around to making another 117 to run on Bron Hebog along with the rest of this set.  Running the green and ivory livery on the WHR would be stretching modeller's licence too far, methinks.

Monday, 17 December 2012

B Wagon Progress

Keeping up with demand for the DZ wagon kits has kept me busy the last couple of weeks casting the component parts but I have found some time to make a little more progress on the follow-up B wagon kit.


I mentioned in a previous post that I'm going to cast the central doors separately, to make it easier to produce other versions of the WHR B wagon like the bike wagons and the coal wagons employed on the FR, and you can see in the picture above how that's going to work.

In their original form the B wagons have a similarity to the DZ wagon with the depressed panel on the lower part of the door.

I had hopes that I would be able to cheat and employ a casting from one of my DZ wagons but it didn't really look right, so I've made another one from scratch using laminated styrene and some Milliput to create the effect of an indentation.

At the right hand side you can see the master for the end piece taking shape.

The next step will be to drill marker holes for the many grab handrails along the bottom of the frame which kit buyers will be able to add to their models should they so wish.

Saturday, 15 December 2012

A Riveting Read

To my utter astonishment the rivet casting experiment has been a complete success!

I poured the moulding compound onto a few test rows of rivet transfers a couple of weeks ago fully expecting them to be pealed off from the styrene when I attempted to remove the set silicone.

I was wrong.  They stayed stuck fast, from which I tentatively conclude that treating them generously with decal fix, followed by a coat of clear varnish, may be the solution to my concerns.


Flushed with success I have decided that I am going to try applying  these rivets to the masters for my forthcoming NGY ballast wagon and B wagon kits which should enhance them even further.

Lets hope this test piece was not a fluke and it will work just as well on proper masters.