Friday, 14 August 2015

Apertures

So I have begun cutting holes in the blank walls of the new farm house.


This is not a quick or easy process because I am using 60 thou styrene sheet to make these buildings, but the hope is that this means they will not go wonky in a hurry.

These are the three walls for the section of the building which faces the front of the layout with huge picture windows in what I assume are the living room and the master bedroom.

My plan is to cut all the window holes, and add the detail of the frames and panes, before I join all the pieces together into a complete house.

It'll take quite a while to get all that done but it'll be very satisfying to see it all come together at once.

Wednesday, 12 August 2015

Water Tanker Finished

Well almost. It's as near as damn it completed.


It still needs to get a spray varnish and some transfer lettering as the finishing touches, plus a couple of footsteps to be attached to the frame at the ends.

Here you can compare how my version compares to the real thing photographed at Beddgelert last week.


Its one of those models which has spent a long time on my to do list and I'm so looking forward to see it running on Bron Hebog next month.

Monday, 10 August 2015

Blank Spaces

I have started work on Cwm Cloch Farmhouse having received the drawings from the Artistic Director last week.

This is the project that I have been saving myself for and will be my sole focus in the remaining few weeks leading up to the layouts being shown at Dinas.

After working on the very complex Oberon Wood houses for the last couple of years it is a relief to get back to a traditional and straightforward dwelling.

Although the farmhouse is substantial is is essential just three connected boxes - not the convoluted jigsaw of the modern houses.

With Oberon Wood I had to build them by finishing each piece in turn and building up the structure bit by bit.

On the farmhouse, I have the luxury of being able to cut out all the blank pieces in one go with utter confidence that they will all fit together as they are supposed to.


So what you see before you here is all the component parts of the walls of the house.

The next stage is to cut out the window apertures.

That won't be so simple because there are rather a lot of them!

Saturday, 8 August 2015

Access Ladders

I reckon on any model there are always some details that you can get away without fitting but also some that are absolutely essential if you're going to capture the feel of the real thing, and on the WHR water tank wagon I reckon that feature is the ladders.

I'd given these a bit of thought all through the build process.

I looked at seeing whether I had anything in stock which would do the job.

I had a spare section of Plastruct ladder but it was way too thick, with too many rungs and not quite wide enough.

Even so I experimented with filing it down and chopping out every other rung to see if I could get away with it but in the end I decided it was too much of a compromise.

Similarly for a while I toyed with the idea of using the plastic ladders which come with the standard gauge Dapol oil tanker kit - which I'd robbed to make the masters for the ends and the tank filler on top - but it was a similar scenario.

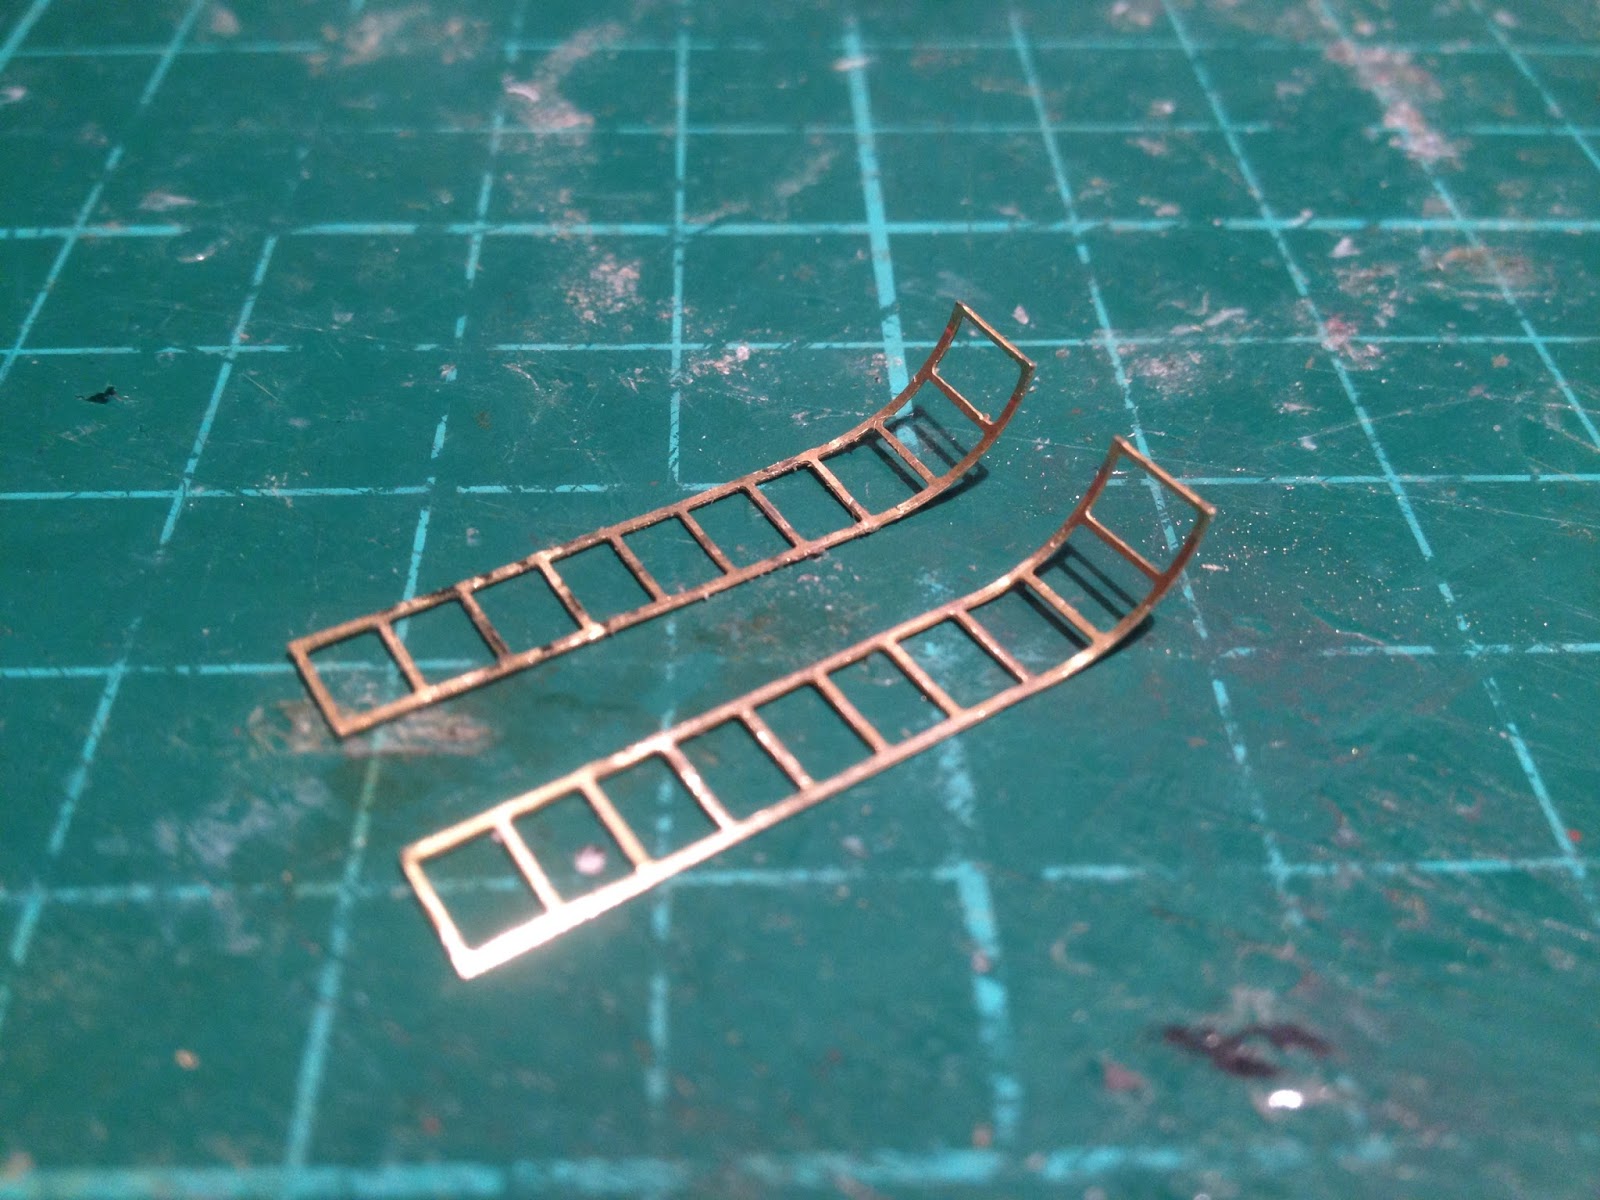
So in the end I pushed the boat out - really quite far out in fact - and ordered a fret of Scalelink etched brass ladders.

I think they're pretty much bang-on for width and not too far off the correct rung spacing either but, jeezo, it's pricey for two measly bits of ladder!


With them cut to length and bent at the top they were given a coat of red oxide primer.


My youngest's Play-Doh came in rather handy for holding them in place while I sprayed!


So here they are ready to be fitted, but I shall tease you for another couple of days before showing you the finished wagon...

Thursday, 6 August 2015

Tanked Up

The moment has come to fix the tank permanently on the wagon now most of the painting is complete.


Until now the pictures I've posted have only had the tank resting on its supports and I knew I was only going to get one chance to get it right - if the filler and platform a the the top ended up slightly tipped to one side or the other it would be indescribably irritating.

To give myself the maximum amount of fiddling time I used epoxy resin and squinted and stared at it from all angles.

I'm as certain as I can be that it's straight.

I'm quite pleased with how it's turned out,  I think it's certainly got the look of the real wagon.

Perhaps the ends aren't quite as bulbous as on the full sized one but I don't think it notices too much.

The real test will be to see it attached behind one of the NGG16's with a train of SAR wagons hung on the back on the layout in a few weeks time.

There is still one major job to do, however, bend, paint and fit the ladders.


Tuesday, 4 August 2015

Farmhouse Plans

The Artistic Director has produced plans for Cwm Cloch Farmhouse.


He's finalised the design after the mock ups I showed you a couple of weeks ago were tried out on the layout.

When I've built it it will finally fill in one of the very obvious remaining blank spaces in the middle of the layout.

The building itself will be quite complicated.

It has three distinct sections, lots of windows, and added extras like porches and lean-to sheds attached as well as two walls which will have to be scribed with exposed stones.

As ever I shall chart my progress here.

Sunday, 2 August 2015

Black Magic

it quite often feels as if painting a model takes longer than building it!

It took me most of a week to get this far with the water tank wagon.


The one picture does not do justice to the number of processes which have to be gone through.

First the sections were sprayed with a primer. In this case it was red oxide because I didn't have any grey or white to hand.

This was fine for the tank body which received its all-over black from an aerosol can, but the grey on the frame, which was hand painted, required two coats.

Then the saddles had to be picked out in black, as well as underneath the frame.

Then the grey had to be touched up where there were any stray bits of black, then the black re-touched......and so it goes on until you're satisfied it's as neat as it's ever going to be.

The finish line is in sight, however, and I can say with confidence that it will be appearing at Dinas next month.